Showing posts with label Imperial Guard. Show all posts

Friday, November 29, 2013

Grey Knights Vs Imperial Guard

Grey Knights Game One


So I had a small grey knights force that I used as allies for my battle sisters.  Then I expanded it a little to make it more usefull.  Then I expanded it again to use as allies for my Tau in a ArdBoyz style 2500 pt tournament (which I have yet to blog).. Then I realized that if I just assembled the 2 boxes of terminators I'd gotten that it would easily make an 1850 list of it's own.  So that's what this is brief photo battle report represents.  My first outing with a pure Grey Knights list.

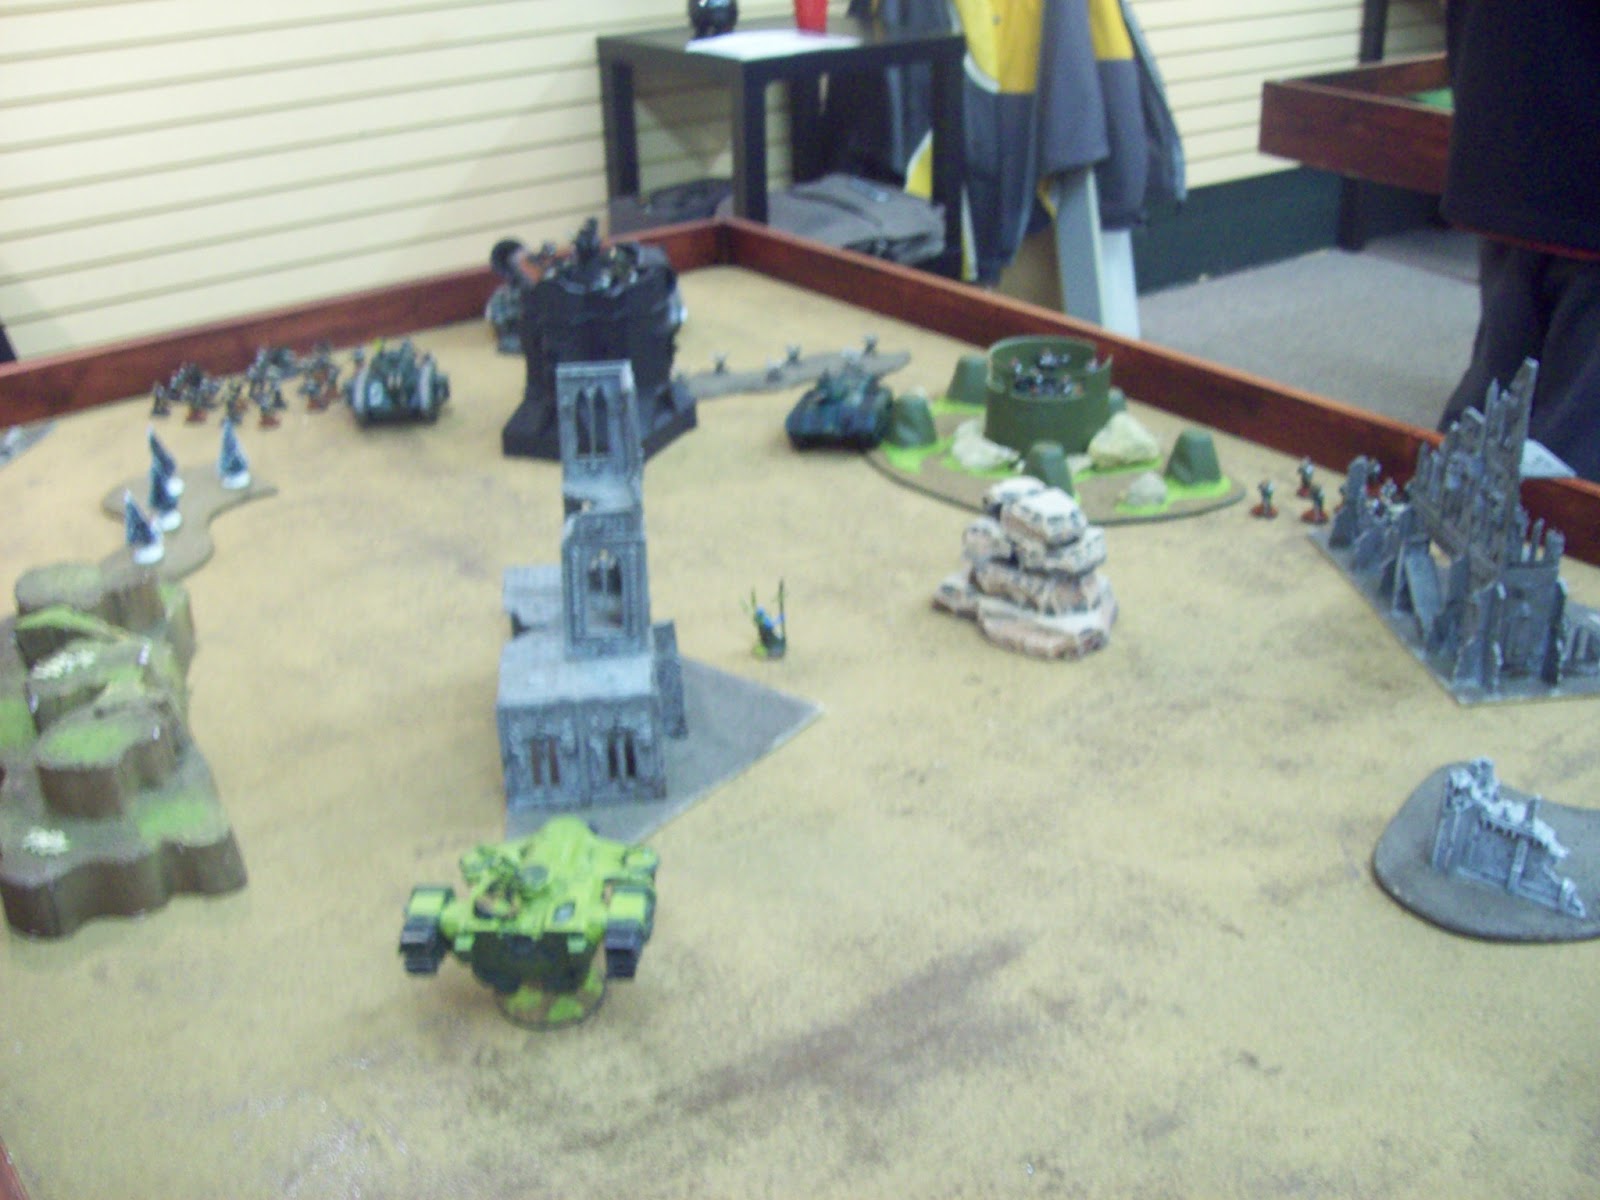
I'm not going to go into a lot of detail as I don't have a copy of my opponents list, and there were some rules confusions with what units could blob together, and how a squadron of tanks can be fielded..  Either way, the mission was emperors will and the deployment was Dawn of War.  We decided to try a narrative terrain, so I set up this battlefield using more or less nova open style terrain.  I know, I know, I was just bitching about Nova Open terrain, but I don't usually do narrative terrain so I wanted to make it more or less "fair".  We treated everything as either Ruins, Hills/impassible, or forest.   My opponent went first, and the game went 6 turns.  We didn't roll for turn 7 as it was pretty clear I'd won after 6.  Final score 8-1.  Here are the pictures and some captions hopefully more or less in order:

Deployment.  He was all on the board, I had a stormraven with a squad
of terminators including Justicare Thawn and a techmarine embarked on it.
I also had a second terminator squad in reserve deepstriking.

My techmarine boltered this ruin to a 3+ save so I deployed mostly
behind it.  It was night fighting, we both rolled the warlord trait to
make it so, he chose not to, but since I was going second I chose to
have it be night fighting turn one.


Totally hiding my Dread Knight.

See all that plasma?  That's why we're hiding.


This looks like end of turn one.  Not much happend other than
him killing a Jokaero and a crusader.

My turn one, this dreadknight flamed the command squad
atop the ruin (bastion) killing all but his commander.

I shunt moved but kept it short to try to get some cover from
the 2 tanks to the left here.  The incinerator took out 7 guardsmen
behind the line there.

In case I foget to mention it, the 6 Jokaero with Coteaz giving
prescience all game failed to take off a single hull point from his tanks.

Turn 2 he shoots the henchmen.  Both my reserves fail to arrive.

This is bottom of turn 2.  As you can see he killed most of the henchmen
squad.  I flamed most of the guardsmen after realizing he had blobbed his
heavy weapon squad in with the rest of the platoon.  We just treated them as
separate units after that.  I tried to assault with the dreadknight here and he managed
2 wounds in overwatch with Plasma or Lascannons and I failed both invulns. 
Dead DreadKnight #1

At least it took most of this unit with it.

This Dreadknight jumped over 12 then assaulted this tank
causing it to explode.  This should have given me first blood until
he mentioned this tank was part of a squadron.  Notice the other tanks
are spread across the board.  Again, we just treated them as seperate
after that even though it would have meant he had like 5 heavies?


I forgot to take any pictures of turn 3.  My reserves came on.  The stormraven flew straight at the squad sitting on his objective and shot the heck out of them.  My terminators deep struck onto my objective.  Not a very exciting move, but I chose to play it save and play to the mission.  I didn't think the henchmen squad would last till the end of the game so I needed a troop to hold my objective.  My 2nd dreadknight flamed the troops on that side of the board then from around the corner of the ruin declared a charge.  Again with the super lucky overwatch and two lost wounds and a dead Dreadknight..  :(  I did take out 7 troops and 2 bases from the heavy wpn team.

Bottom of turn 4.  Stormraven went into skimmer mode and moved 6".
Troops disembarked and set up to multi assault the two leman russ tanks.
Storm Raven Exploded the far left tank, and POTMS the heavy team with
the assault cannon killing one base.  The terminators and Tech Marine
assaulted the other Leman Russ which hadn't moved, and with 5 str 10 attacks
auto hit, auto penned and blew it up as well.

The basilisk continued to try to displace the terminators on my objective
on turn 5.

The storm raven moved 12 and put 4 assaultcannon and 1 mmelta
shot into the remaining tank on this board side.  The melta again exploded it.
The troops killed a base of heavy wpns and the remaining base
broke and fell back off the board.


The Basilisk continued to shell the terminators on my side, while
the platoon by the bastion tried to kill the other terminators.  The previous
turn he had "killed" justicare thawn, who got back up on my turn.  He
killed him again, but he got back up on my turn 6 as well.


Turn 6 coteaz and the remaining Jokaero ran to help secure my
objective just in case the basilisk was successful on turn 7.

Thawn and the sole remaining member of his old squad accompanied
by the tech marine both grabbed the sabotaged objective on his side.

As a matter of good practice, the storm raven flew over and
killed his commander with the autocannon and multimelta on turn 6.


We decided at that point that with not troops able to contest, and
no real likelihood that he could kill 2 squads of troops from each of the
two objectives, that there was no point to roll for turn 7.

All in all, I was mostly pleased with my list.  However, I'm not convinced the Henchman squad pulled their weight.  Part of that was due to my opponent not having any reserves, and never encrouching on my half of the table.  Part of it was just that even lascannons have a hard time with av14..  I may drop them for a a couple smaller units next time to better hold objectives.  The two squads of terminators didn't feel like they did a lot either.  I may keep the Thawn squad but try to do something different with the other 275 points.  I may even try adding celestine and some sisters in just to work that respawning nuisance angle.

Wednesday, January 23, 2013

Tau vs Guard 1500 League Rematch

P.S.  This is the BOMB!

Farsight Drops
the Bomb!

Tonight I had the opportunity to replay one of my 2 1500 pt league matches after a rules snafu by my opponent had invalidated the original result.  We both ran the same lists per the league rules, and convienantly, we rolled the same mission (the relic) and deployment (Vanguard Strike) as we had played in the first game.

IGWarlord won the rolloff to deploy terrain first (per league rules, all terrain is placed, then there is a roll off to choose sides/deploy first, at which time fortifications can be placed).  The terrain was laid out with me ensuring that no corner of the board had total LOS blocking terrain in it for him to hide his two Colossus Artillery tanks in.  Once the terrain was placed, we rolled off and I won the chance to deploy/choose sides first.  Given that one corner had almost no terrain in it, I did the obligatory douchebag thing and stuck him with that corner, and I took the other (hey, he was the one that put the two pieces of lousy terrain in that corner in the first place..)  We also rolled for night fighting on turn one.

I deployed my troops, consisting of the following:

Total Roster Cost: 1496

HQ: Commander Shas'o (3#, 218 pts)
   1 Commander Shas'o, 188 pts = (base cost 75 + Airbursting Fragmentation Projector 20 + Cyclic Ion Blaster 15 + Ejection System 15 + Hard-wired Blacksun Filter 3 + Hard-wired Multi-tracker 5 + Hard-wired Target Lock 5 + Iridium Armour 20 + Stimulant Injector 10 + Shield Generator 20)
      1 Shield Drone, 15 pts
      1 Shield Drone, 15 pts

HQ: Commander Farsight (10#, 661 pts)
   1 Commander Farsight, 170 pts
      1 Crisis Bodyguard, 59 pts = (base cost 35 + Burst Cannon 8 + Hard-wired Multi-tracker 5 + Hard-wired Target Lock 5 + Twin Linked Flamer 6)
         1 Shield Drone, 15 pts
         1 Shield Drone, 15 pts
      1 Crisis Bodyguard, 75 pts = (base cost 35 + Hard-wired Multi-tracker 5 + Hard-wired Target Lock 5 + Missile Pod 12 + Twin Linked Fusion Blaster 18)
      1 Crisis Bodyguard, 59 pts = (base cost 35 + Burst Cannon 8 + Hard-wired Multi-tracker 5 + Hard-wired Target Lock 5 + Twin Linked Flamer 6)
      1 Crisis Bodyguard, 75 pts = (base cost 35 + Hard-wired Multi-tracker 5 + Hard-wired Target Lock 5 + Missile Pod 12 + Twin Linked Fusion Blaster 18)
      1 Crisis Bodyguard, 59 pts = (base cost 35 + Burst Cannon 8 + Hard-wired Multi-tracker 5 + Hard-wired Target Lock 5 + Twin Linked Flamer 6)
      1 Crisis Bodyguard, 59 pts = (base cost 35 + Burst Cannon 8 + Hard-wired Multi-tracker 5 + Hard-wired Target Lock 5 + Twin Linked Flamer 6)
      1 Crisis Bodyguard, 75 pts = (base cost 35 + Hard-wired Multi-tracker 5 + Hard-wired Target Lock 5 + Missile Pod 12 + Twin Linked Fusion Blaster 18)

Fast Attack: Pathfinder (7#, 143 pts)
   4 Pathfinder, 48 pts = 4 * 12
      1 Devilfish, 95 pts = (base cost 80 + Disruption Pod 5 + Multi-Tracker 10)

Troops: Fire Warrior (9#, 155 pts)
   6 Fire Warrior, 60 pts = 6 * 10
      1 Devilfish, 95 pts = (base cost 80 + Disruption Pod 5 + Multi-Tracker 10)

Troops: Fire Warrior (6#, 60 pts)
   6 Fire Warrior, 60 pts = 6 * 10

Elite: Crisis Shas'vre (1#, 71 pts)
   1 Crisis Shas'vre, 71 pts = (base cost 25 + Hard-wired Blacksun Filter 3 + Twin Linked Missile Pod 18 + Positional Relay 15 + Team Leader 5 + Shas'vre Upgrade 5)

Heavy Support: Broadside Battlesuit (3#, 188 pts)
   1 Broadside Battlesuit, 93 pts = (base cost 70 + Hard-wired Blacksun Filter 3 + Hard-wired Target Lock 5 + Targeting Array 10 + Team Leader 5)
      1 Broadside Battlesuit, 80 pts = (base cost 70 + Targeting Array 10)
      1 Shield Drone, 15 pts

IG Warlord mid deployment.


I placed the 2 devilfish, a firewarrior team, the broadsides, and the monat crisis suit on the board as pictured (the crisis suit was in the building under the broadsides).  I reserved the pathfinders, firewarriors, and attached the shas'o to Farsights team deepstriking.

My opponent deployed his forces consisting of something like:

1500 Pts - Imperial Guard Roster - IG 1500 1750?

Total Roster Cost: 1765

HQ: Company Command Squad (5#, 210 pts)
   2 Company Command Squad, 64 pts = 2 * 6 (base cost 6) + Camo Cloak 20 + Carapace Armour 20 + Flamer x1 5 + Grenade Launcher x1 5 + w/Lascannon 32
      1 Veteran Heavy Weapon Team, 30 pts = (base cost 10 + Lascannon 20)
      1 Lord Castellan Creed, 116 pts

HQ: Company Command Squad (6#, 165 pts)
   4 Company Command Squad, 84 pts = 4 * 6 (base cost 6) + Plasma gun x4 60
      1 Company Commander, 26 pts
      1 Chimera, 55 pts

Troops: Infantry Platoon (36#, 260 pts)
   1 Infantry Platoon, 0 pts
      2 Platoon Command Squad, 14 pts = 2 * 6 (base cost 6) + w/Missile Launcher 27
         1 Heavy Weapons Team, 25 pts = (base cost 10 + Missile Launcher 15)
         1 Platoon Commander, 6 pts
      7 Infantry Squad, 35 pts = 7 * 5
         1 Heavy Weapons Team, 20 pts = (base cost 10 + Autocannon 10)
         1 Commissar, 35 pts
         1 Sergeant, 5 pts
      7 Infantry Squad, 35 pts = 7 * 5
         1 Heavy Weapons Team, 20 pts = (base cost 10 + Autocannon 10)
         1 Sergeant, 5 pts
      7 Infantry Squad, 35 pts = 7 * 5
         1 Heavy Weapons Team, 20 pts = (base cost 10 + Autocannon 10)
         1 Sergeant, 5 pts

Troops: Veteran Squad (10#, 120 pts)
   9 Veteran Squad, 113 pts = 9 * 7 (base cost 7) + Meltagun x2 20 + Grenadiers 30
      1 Veteran Sergeant, 7 pts

Troops: Veteran Squad (10#, 120 pts)
   9 Veteran Squad, 113 pts = 9 * 7 (base cost 7) + Meltagun x2 20 + Grenadiers 30
      1 Veteran Sergeant, 7 pts

Heavy Support: Leman Russ Squadron (1#, 220 pts)
   1 Leman Russ Squadron, 0 pts
      1 Leman Russ Exterminator, 170 pts = (base cost 150 + Heavy Bolter Sponsons x2 20)
         1 Knight Commander Pask, 50 pts

Heavy Support: Ordnance Battery (1#, 140 pts)
   1 Ordnance Battery, 0 pts
      1 Colossus, 140 pts

Heavy Support: Ordnance Battery (1#, 140 pts)
   1 Ordnance Battery, 0 pts
      1 Colossus, 140 pts

Fast Attack: Vendetta Gunship Squadron (1#, 140 pts)
   1 Vendetta Gunship Squadron, 0 pts
      1 Vendetta, 140 pts = (base cost 130) + Heavy Bolter Sponsons x2 10

Fast Attack: Vendetta Gunship Squadron (1#, 140 pts)
   1 Vendetta Gunship Squadron, 0 pts
      1 Vendetta, 140 pts = (base cost 130) + Heavy Bolter Sponsons x2 10

: Imperial Bastion (2#, 110 pts)
   1 Imperial Bastion, 75 pts
      1 Gun Emplacement, 35 pts = (base cost 0 + Icarus Lascannon 35)


Looking back at the pictures, I'm pretty sure that his list included all of the above at least (Edit 1: any reference to a mystery squad later is because I hadn't realized I could add an extra squad to the guard in army builder, I went back and added them into this list so hey are there now, but weren't when I did the write up.  Edit 2: I also recalled his commenting he'd forgot his vetrans had carapace which is a 30pt times 2 squad upgrade bumping the points overrun up further).. I'm not sure how that's possible as the list above is 200+ points over the 1500 limit, and I may have skipped some special wpns/wargear even then..  I'll see if I can get him to comment with his actual list..  But assigning the units above to the units in the picture, I'm a bit confused.

So army lists aside, he failed to seize the initiative so I went first.

IGwarlord moving bottom turn 1
Turn 1:  I moved my devilfish around, my broadsides split fire on the bastion and a colassus.  Failed to pen the bastion, exploded the collassus (first blood to me)


He moved his blob squad, and the mystery squad that isn't listed above toward the ruin that was just outside his deployment zone.  He then ordered the blob to "move move move" and they did, his weapons fire was inefective due to night fighting giving my devilfish 2+ cover saves.


Turn 2:  All my reserves came on.  Firewarriors embarked in the pathfinder fish, pathfinders hid in the far corner behind a ruil, farsight bomb missed the initial deepstrike roll, but re-rolling due to the pathfinder fish they scattered 2" into an ideal landing zone.  I moved the devil fish around a bit, then went on to shooting.  Farsight's team split fire with 4 twin linked flamers causing 19 hits/17 wounds plus a couple more from burst cannons on the blob squad reducing it too 1 model remaining, Farsight and a twin linked fusion/MP suit took 2 hull points off the Leman Russ and imobilized it.  A fusion suit target the bastion and destroyed a gun emplacement.  Shas'O dropped a barrage shot onto the battlements killing the lascannon team, 1 guardsman and put 1 wound on the Warlord.  The other Fusion suit exploded the remaining Colossus.
The Bomb.
After the bomb.


He got 1 out of 2 vendetta out of reserves on his turn 2.  He managed to imobilize his second HQ's chimera and further shifted part of mystery squad into the ruins second floor.  The vendetta killed a shield drone and 1 broadside but the remaining one made it's moral.  Warlords squad killed a drone and a suit that controlled 2 other drones, causing a moral check which I passed.


Turn 3:   I moved up 2 dfish to the Relic (my ethereal), one went flat out, the other went 6 and deployed 6 firewarriors into contact with the relic.  Monat suit moved up towards center board, and farsight's team spread out a bit to fire at the single guardsman, the tank, the bastion the chimera, and the platoon command squad in the green ruin.  The tank died, the icarus and a heavy bolter were destroyed in the bastion, the chimera lived, but the missle team and 2 other models died in the green ruin from the Shas'o's AFP+Cyclic Ion shots.

His other vendetta came on, and he dropped off a vet squad near the broadside.  He also moved is warlords remaing squad inside the bastion.  His vendetta exploded the flat-out DFish killing 2 guys inside, and one from the team with the relic. but not much else happend.


Turn 4:  I circled around the bastion to put shots into it, the chimera and the remaining guys in the green ruin area.  I moved my firewarriors into the ruin and the other team onto the ruins base.  The DFish I moved back to get a rear arc shot on a vendetta, but instead chose to flat out, and imobilized myself on a piece of terrain.  I destroyed the Bunker, killing everyone inside (after another rules snafu where my opponent read the book and declared that it said one thing, but a bystander later in the turn read the same section to discover it said something entirely different and that you take 2d6 str 6 wounds, not each model takes a 2D6 str wound when you get a 6 on the chart.  Big diff when you only have 2 models remaining).  I missed the dudes by the green ruin again.

He moved a vendetta over to attack Farsight, moved the other over the ruins my firewarriors were in and dropped more veterans..  He moved his first vets over to fire on the remaining devil fish.  He killed two TLFL/BC suits with one vendetta, and his vets killed 3 out of 4 firewarriors in one squad and 1 inside the ruin from a flamer hit.

Mid 4th turn move.
End of top of 5 shooting.


Turn 5:  I moved farsights team around, moved the firewarrirs out with the relic to shoot at the guardsmen, detached the drones from my fish and advanced towards his deployment zone.  Farsights team got a lucky hit with a fusion blaster and exploded a vendetta, the Shas'O dropped his AFP shot on the vets and along with firewarrior shooting they were reduced to 4 models and failed their moral falling back.
Alas, I forgot to take pictures after this.  Bottom of Turn 5 movement phase.

Bottom of turn 5 he put his remaining vendetta into hover and moved over to fire on my firewarriors.  Somehow his 4 vets, regrouped and managed to move 6 inches (or far enough to get past the base of the ruin, and they, the other vets,  and the vendetta killed all but 2 firewarrios in the squad with the relic.  They then assaulted and wiped out the firewarriors consolidating onto the relic.  The mystery squad killed my two drones, and the 3 models in the vicinity of the green ruin shot ineffectually at Farsights team.

We rolled for turn 6 but the game ended.  I had scored first blood, slay the warlord, and had linebreaker.  He was a couple inches from linebreaker with the vets that dropped near the broadside, but in the end had no secondary points.  As he did not get into base with the relic in the move phase, he could not claim it and so I won 3 points to none.

Thanks for taking the time to read my post, I try to get a game in weekly if not 2.. I'm trying to be better about making reports and keeping the blog lively, so check back often.

Tuesday, January 8, 2013

Tau Vs Imperial Guard 1750


Lastnight I played my second league match at the 1750 point level vs Josh's Imperial Guard.  I've played Josh countless times in the past and had a pretty good idea what to expect, and had developed my list with him in mind as my other 1750 opponent was running Chaos Marines whom I've never played against, and thus I was just hoping that my list would also work against them.

My list consisted of the following:

Initial Deployment, thats my aegis defense line wrapped around a piece of area terrain in the center.
 1750 Pts - Tau Empire Roster - Tau League 1750 Warfish Special

Total Roster Cost: 1747

HQ: Commander Shas'o (2#, 188 pts)
   1 Commander Shas'o, 173 pts = (base cost 75 + Airbursting Fragmentation Projector 20 + Cyclic Ion Blaster 15 + Hard-wired Blacksun Filter 3 + Hard-wired Multi-tracker 5 + Hard-wired Target Lock 5 + Iridium Armour 20 + Stimulant Injector 10 + Shield Generator 20)
      1 Shield Drone, 15 pts

Heavy Support: Broadside Battlesuit (4#, 278 pts)
   1 Broadside Battlesuit, 108 pts = (base cost 70 + Hard-wired Blacksun Filter 3 + Hard-wired Multi-tracker 5 + Hard-wired Target Lock 5 + Twin Linked Plasma Rifle 10 + Targeting Array 10 + Team Leader 5)
      1 Broadside Battlesuit, 80 pts = (base cost 70 + Targeting Array 10)
      1 Broadside Battlesuit, 75 pts = (base cost 70 + Target Lock 5)
      1 Shield Drone, 15 pts

Heavy Support: Broadside Battlesuit (4#, 278 pts)
   1 Broadside Battlesuit, 108 pts = (base cost 70 + Hard-wired Blacksun Filter 3 + Hard-wired Multi-tracker 5 + Hard-wired Target Lock 5 + Twin Linked Plasma Rifle 10 + Targeting Array 10 + Team Leader 5)
      1 Broadside Battlesuit, 80 pts = (base cost 70 + Targeting Array 10)
      1 Broadside Battlesuit, 75 pts = (base cost 70 + Target Lock 5)
      1 Shield Drone, 15 pts

Heavy Support: Hammerhead Gunship (1#, 195 pts)
   1 Hammerhead Gunship, 195 pts = (base cost 90 + Railgun 50 + Two Burst Cannons 10 + Disruption Pod 5 + Flechette Discharger 10 + Multi-Tracker 10) + Blacksun Filter 5 + Sensor Spines 10 + Target Lock 5

Troops: Fire Warrior (7#, 180 pts)
   6 Fire Warrior, 60 pts = 6 * 10
      1 Devilfish, 120 pts = (base cost 80 + Disruption Pod 5 + Multi-Tracker 10 + Smart Missile System 20) + Targeting Array 5

Troops: Fire Warrior (7#, 180 pts)
   6 Fire Warrior, 60 pts = 6 * 10
      1 Devilfish, 120 pts = (base cost 80 + Disruption Pod 5 + Multi-Tracker 10 + Smart Missile System 20) + Targeting Array 5

Troops: Fire Warrior (7#, 180 pts)
   6 Fire Warrior, 60 pts = 6 * 10
      1 Devilfish, 120 pts = (base cost 80 + Disruption Pod 5 + Multi-Tracker 10 + Smart Missile System 20) + Targeting Array 5

Fast Attack: Pathfinder (5#, 168 pts)
   4 Pathfinder, 48 pts = 4 * 12
      1 Devilfish, 120 pts = (base cost 80 + Disruption Pod 5 + Multi-Tracker 10 + Smart Missile System 20) + Targeting Array 5

: Aegis Defence Lines (2#, 100 pts)
   1 Aegis Defence Lines, 50 pts
      1 Gun Emplacement, 50 pts = (base cost 0 + Quad-gun 50)


Josh ran something like this: (I'm not sure on the exact load out of his units)


There's a Manticore in the building the the back left.  Plus he had 3  Vendetta's with 2 vet squads and a command squad.


Commisar
30 man blob squad with 3 autocannons
Manticore
Leman Russ x2
Vendetta x2 with vet squad x2
Vendetta with command platoon with flamers x4 and a commander of some sort
Allies: Rune Priest
Drop Pod with 10 grey hunters
Aegis Defense line with quad gun.


Josh won the roll off to go first, we rolled night fighting for turn one, and he deployed as seen above, I deployed second as shown at the top and failed to sieze.


My entire army list had been designed around the plan to use my 4 warfish with Smart Missile systems to move up to 24" from Josh's defense line and to hammer his blob squad denying him the cover from the defense line and to wipe out his blob and thus his Warlord.  Unfortunately, we rolled hammer and anvil, and since I was going second I chose to hide all my warfish behind the ruin at that back of my deployment zone (big mistake).  This meant there was no way to get them in range of the defense line in one turn.  We also rolled the scouring as the mission type, and with 2 objectives at the back of my deployment I didn't want to move my troops all the way out to his end.  The end result of this was that I never threatened his blob squad for the entire game.  I shot 3 broadsides at the quad gun once, hit twice, wounded twice, and he made the 4+ cover save on both.  After that I just ignored the quad gun.  My other mistake was that I had planned to place my Shas'O on the quad gun, but at the last minute attached him to 4 pathfinders hoping to outflank and attack his Manticore on turn 2.  As always, my dice failed me and even with Acute senses rerolling the side I came in on, I rolled the wrong table edge.  As such I brought them in on turn 2 in my deployment zone as they stood no chance against the 30 man blob.  In the end this just meant my Shas'O ate 3 twin linked lascannon shots and died having served no purpose.

On turn one he deepstruck the Grey Hunters in between my defense line and a ruin, and disembarked into the ruin to try to take out my hammer head.  He failed to do any damage, and on the bottom of turn one I fired all 6  broadsides at the drop pod to score first blood.  I focused everything I could at wiping out the grey hunters for the following 2 turns to remove them as a line break threat.  This was a mistake as he had 3 vendetta's with troops in them, and all 3 would eventually deploy into my zone anyway.  I should have focused the broadsides on removing the 2 leman russ as threats as the battle cannons were a huge distraction and kept me bottled up in my deployment zone.

Top of turn 2.  Hammerhead is already dead, Pathfinder Warfish is Dead, and I am boxed in where I'd remain the rest of the game.  My Shas'O would enter right in front of the near Vendetta bottom of turn 2, only to eat a lascannon top of turn 3.
 The rest of the game was unremarkable until the bottom of turn 5.  At the bottom of turn 5 I was in position to win the game.  I had scored first blood, and had a team of firwarriors on the 3 point objective.  He scored Slay the Warlord, had linebreaker, and was sitting on a 1 point objective.  If the game had ended there I would have won 4 to 3.  He rolled to see if the game continued and it did.  Sad Face.  He focused all his fire between my broadsides and the 6 man firewarriors on the objective top of turn 6.  He managed to kill 1 broadside, leaving me 2 and a drone (25% loss) and he killed 2 out of 6 firewarriors (requiring another moral check).  He also moved the command squad onto the 2 point objective the broadsides were contesting.  End of the shooting phase, my broadsides failed their ldr 8 moral check and fell back 11 inches! and off the board giving him control of 2 more points.  My firewarriors who had gone to ground still held.  Bottom of turn 6 my 1 remaining broadside put 2 hits on the 3 remaining models in his command squad but he made both saves as he was behind MY defense line.  The firewarriors had 2 models that could see the command squad but having gone to ground both failed to hit.

That was the end of the game.  Josh controlled 3 points of objectives, had line breaker, and slay the warlord for a total of 5 points.  I had 3 points of objectives and had first blood for 4 points.

All in all it was a good game, but the Tau are, ironically enough, horribly out gunned by the Imperial Guard. A vendetta costs less than half what 3 broadsides cost for the same firepower plus the added utility of being a flyer and a troop transport..  I have no ordinance and no heavy weapons for my troops.  It's just a poor match-up at best

At this point, I rely am just playing for the experience in hopes that a new Tau Codex is just around the corner and it will do something to level the playing field a bit vs all the newer codecies out there.

Till next time, good gaming.

Sunday, November 25, 2012

After a brief Hiatus from gaming, I have recently gotten back into playing 40K and have been working on painting my army again. I've even joined a local escalation league at the midway point (1250), and have thus far been relatively successful.

For my two league games at the 1250 level (both ringer games as my opponents already had their league games in) I first played Aaron and his Ultra Marines. We rolled the Relic, and Hammer and anvil.

My list was composed as follows:

1250 Pts - Tau Empire Roster - 1250 League v6

HQ: Commander Shas'el (2#, 97 pts)
1 Commander Shas'el, 97 pts
1 Shield Drone (Automatic Unit Type; Shield Generator)

Troops: Fire Warrior (12#, 255 pts)
10 Fire Warrior,
1 Shas'ui (Markerlight target lock)
1 Devilfish (warfish)

Troops: Fire Warrior (12#, 255 pts)
10 Fire Warrior,
1 Shas'ui (Markerlight target lock)
1 Devilfish (warfish)


Fast Attack: Pathfinder (9#, 216 pts)
8 Pathfinder,
1 Devilfish (Warfish)

Heavy Support: Broadside Battlesuit (3#, 178 pts)
1 Broadside Battlesuit (Team Leader, SMS, HWMT, HWTL, HWDC, BSF)
1 Broadside Battlesuit (SMS, MT)
1 Shield Drone (Automatic Unit Type; Shield Generator)

Heavy Support: Broadside Battlesuit (3#, 178 pts)
1 Broadside Battlesuit (Team Leader, SMS, HWMT, HWTL, HWDC, BSF)
1 Broadside Battlesuit (SMS, MT)
1 Shield Drone (Automatic Unit Type; Shield Generator)

Heavy Support: Hammerhead Gunship (1#, 190 pts)
1 Hammerhead Gunship, (Railgun, + all options)


Aarons Ultra marines were something to this effect (I'm missing some wargear options as this doesn't add up to 1250):

Captain in artificer armor (Warlord) with plasma pistol and ? attached to 10 sternguard with a combi melta and two plasma guns in a drop pod
2 5 man tac squads in rhinos
1 devastator squad with 2 las, 2 missile, and like 5 or 6 extra models with bolters to absorb shots (there was some character or something attached I think, that may account for the missing points)
Scout squad with cloaks of 5 including tellion
1 Vindicator

Since I didn't take any pictures, I'll just summarize the game. Aaron won the roll-off and chose to go first. He scored first blood top of turn one, after deepstriking the HQ and sternguard in behind my hammerhead and glancing it to death (I think it's BS that I don't get a Jink on my skimmers if I haven't taken a turn yet to move them, it's not like they've been sitting there immobilized prior to this battle starting). This also set him up to score line breaker later as he had 1 sternguard left at the end of the game that I just couldn't kill. In return, I eventually killed his Warlord with massed fire, and managed to snag the relic at the bottom of turn 7 by jumping my 2nd firewarrior team out of a devil fish I'd been using to block his tac squads from getting near it. Amusingly I had a second devil fish there to aid in the denial, which was eventually imobilized, but with some luck DPod rolls it managed to survive till the end of the game.

Final score, Tau 4, Ultra marines 2.


My 2nd match was against Josh's Imperial Guard. I ran the same list as it was a league, and you had to run the same list for both games at a given point level. We rolled vanguard strike and the relic (2nd game in a row). Josh ran something like:

Lord Commisar
Platoon command squad
Large Blob squad with HQ attached
Aegis Defense Line with Quad Gun (fired by Commisar)
Leman Russ x 2 with standard battle cannon
Manticore (buried in a ruin in the back corner with no LOS in or out)
Vetsquad with 10 men and 2 plasmaguns in
Vendetta x 2

Again I failed to take any pictures, mostly because my phone service is off so I haven't been carrying it around.. Josh won the roll off and went first. We rolled and got night fighting for turn one He illuminated a devilfish with a leman russ's spotlight, then since it was "illuminated", could target it with his Manticore which was outside of 36" which is the cut off for targeting when nightfight is active. I realize the rules can't account for every circumstance, but how is it that a vehicle with no line of site to a target, can then shoot at it beyond the targeting range just because there is a spotlight on it? No idea, but suffice it to say that his Str 10 ap 1 large blast exploded one devilfish, and immobilized the one next to it while also killing 4 firewarriors and a pathfinder that were nearby, giving him first blood, and severely limiting my tactical options as far as getting near the relic. I deepstruck my Shas'el in behind the manticore on turn 2, hoping to neutralize it even though I expected it would cost me a vp for slay the warlord.. Of course he scattered out from behind the Ruin and only had a shot at a Leman russ that my broadsides had taken a hull point off from. He glanced that to death, then managed to jump back into the ruin on his thrust move. He never did kill the damn manticore, but wittled down a good chunk of the command blob squad and scored me Line breaker at the end of the game. I did manage to shoot down a zooming vendetta with my broadsides, killing 8 of 10 guys inside. This would have left them in position to get linebreaker, but I eventually killed one and the other was falling back at the end of the game. The final tally left us with no one in possession of the relic, Josh had first blood, and I had line breaker.

Tau 1, Imperial Guard 1 for a tie.


In preparation for the 1500 point level starting in a week, I thought I'd try something different and got in a practice game at Battlefront vs Jakes Imperial guard list Saturday. We initially rolled vanguard strike and the scouring, but we both hate that mission with the 6 random pt objectives, so we rerolled and got... THE RELIC!.. That was better than the scouring, so we went with it for the 3rd time in a row. I ran the following:

1500 Pts - Tau Empire Roster - Tau 1500 league V2

Total Roster Cost: 1499

HQ: Commander Shas'o (2#, 188 pts)
1 Commander Shas'o, 173 pts = (base cost 75 + Airbursting Fragmentation Projector 20 + Cyclic Ion Blaster 15 + Hard-wired Blacksun Filter 3 + Hard-wired Multi-tracker 5 + Hard-wired Target Lock 5 + Iridium Armour 20 + Stimulant Injector 10 + Shield Generator 20)
1 Shield Drone, 15 pts

Troops: Fire Warrior (7#, 216 pts)
5 Fire Warrior, 50 pts = 5 * 10
1 Shas'ui, 46 pts = (base cost 20 + Markerlight 10 + EMP Grenade 3 + Hard-wired Blacksun Filter 3 + Hard-wired Multi-tracker 5 + Hard-wired Target Lock 5)
1 Devilfish, 120 pts = (base cost 80 + Disruption Pod 5 + Multi-Tracker 10 + Smart Missile System 20) + Targeting Array 5

Troops: Fire Warrior (10#, 136 pts)
9 Fire Warrior, 90 pts = 9 * 10
1 Shas'ui, 46 pts = (base cost 20 + Markerlight 10 + EMP Grenade 3 + Hard-wired Blacksun Filter 3 + Hard-wired Multi-tracker 5 + Hard-wired Target Lock 5)

Fast Attack: Pathfinder (9#, 172 pts)
6 Pathfinder, 72 pts = 6 * 12
1 Devilfish, 100 pts = (base cost 80 + Disruption Pod 5 + Multi-Tracker 10) + Targeting Array 5

Heavy Support: Sky Ray Missile Defence Gunship (1#, 170 pts)
1 Sky Ray Missile Defence Gunship, 170 pts = (base cost 125 + Smart Missile System 20 + Disruption Pod 5 + Multi-Tracker 10) + Blacksun Filter 5 + Targeting Array 5

Heavy Support: Sky Ray Missile Defence Gunship (1#, 170 pts)
1 Sky Ray Missile Defence Gunship, 170 pts = (base cost 125 + Smart Missile System 20 + Disruption Pod 5 + Multi-Tracker 10) + Blacksun Filter 5 + Targeting Array 5

Heavy Support: Broadside Battlesuit (4#, 200 pts)
1 Broadside Battlesuit, 90 pts = (base cost 70 + Hard-wired Target Lock 5 + Advanced Stabilisation System 10 + Team Leader 5)
1 Broadside Battlesuit, 80 pts = (base cost 70 + Advanced Stabilisation System 10)
1 Shield Drone, 15 pts

Elite: Stealthsuits (3#, 152 pts)
1 Stealthsuits, 40 pts = (base cost 30 + Targeting Array 10)
1 Stealthsuit Shas'vre, 72 pts = (base cost 35 + Targeting Array 10 + Hard-wired Multi-tracker 5 + Hard-wired Target Lock 5 + Markerlight 10 + Shas'vre Upgrade 5) + Fusion Blaster 2

Fast Attack: Piranha Light Skimmer (3#, 95 pts)
1 Piranha Light Skimmer, 95 pts = (base cost 60 + Disruption Pod 5) + Fusion Blaster x1 5 + Seeker Missile x2 20 + Targeting Array x1 5


Jake ran something like:

Lord Commissar with small command squad in a chimera
30 man blob squad with some grenade launchers and a commisar?
Platoon command squad with heavy bolter and a standard of some sort
Vet squad in a chimera
heavy wpn team x 3 missle launchers
heavy wpn team x 3 lascannons
Basilisk
Leman Russ x 2 with standard battle cannon
Aegis defense line but no gun emplacement


He won the roll off to go first, and I failed to seize. My warlord got the ability to make it nightfighting turn 1, so I did so as every unit I had had Blacksun Filters. He failed to kill any units on turn one, and through significant use of markerlights, I managed to destroy his vets chimera with seeker missiles hitting from the side from my piranha which had moved flat out all the way to his board edge and from the front from the two skyrays, and put a hull point on the command chimera, first blood to me. After turn one, the Skyrays were really pretty worthless as far as the seaker missles were concerned. Strength 8 ap 3 is just not enough to reliably put glancing hits on av 13-14.. The sms systems on them helped by ignoring cover and taking out most of the missle launchers, but all things considered, they seemed to have wasted 2 heavy slots while performing no better than a warfish. I'd rather have had 2 Ionheads, or 2 2 man broadside teams in their place. The 3 man stealth team payed for themselves easily. They contributed a markerlight hit toward killing the chimera turn one, they wiped out the lascannon squad (all but one wound to which I donated a railgun shot in order to finish them off on turn 2). They drew fire from the basilisk turn 3 saving my firewarriors from getting pancaked. They wiped out most of his Warlords unit on turns 4 and 5 which let me finish off his warlord with a railgun shot on turn five. And they scored me line breaker as the game ended after 5. In the final tally, no one was on the relic, though I had 6 firewarriors an inch from it. I'd scored first blood, slay the warlord and linebreaker. Jake had no points.

Tau 3, IG 0 for a win.


So, in summary, out of the 3 games I've played most recently, I would have to say that the return of Target Locks to my infantry, and the improvements to Disruption Pods have really helped make the Tau feel somewhat competative. My vehicles and stealth suits are so much more survivable now it is just huge. Much as I want to like the Skyray, it just under performs dreadfully. If the seekers had some missle options, or weren't limited to 6 per vehicle, or if the skyray had skyfire as it should, it might be a different story, but as it is, they will be going back on the shelf till a tau codex or an errata comes out to fix them.

If you made it this far. Thank you very much for taking the time to read my post. I'll make sure to include some pictures from now on.

Wednesday, June 20, 2012

I played Josh's IG at 1500 pts yesterday.  We got a late start so we only made it through 3 rounds (barely) but I thought I'd throw a few images up anyway.  He was trying out some new units in his list, but the models hadn't arrived yet, or had just been assembled.  I ran a farsight list.  I went first in a spearhead annihilation match with a capture and control secondary element.  My son took over the camera for a while so there are some less than informative "artistic" shots here :)


Just for kicks I photoshop'd in some lascannon models to replace the cups on the image above.