Showing posts with label battle report. Big Kidz Games. Show all posts

Wednesday, January 30, 2013

Tau/Eldar vs Tyranids 2000 pts

Snatching Victory from the Claws of Defeat

Got in my second and last league match tonight at the 2000 pt level.
It was my second battle using my eldar allies, and man was I glad to have them today, but more on that later.

First, the army lists.  I ran the same list I ran vs the Ultra Marines in the previous report consisting of the following:

Total Roster Cost: 1996

HQ: Commander Shadowsun (4#, 175 pts)
   1 Commander Shadowsun, 175 pts

Heavy Support: Broadside Battlesuit (4#, 263 pts)
   1 Broadside Battlesuit, 98 pts = (base cost 70 + Hard-wired Blacksun Filter 3 + Hard-wired Multi-tracker 5 + Hard-wired Target Lock 5 + Targeting Array 10 + Team Leader 5)
      1 Broadside Battlesuit, 75 pts = (base cost 70 + Multi-Tracker 5)
      1 Broadside Battlesuit, 75 pts = (base cost 70 + Multi-Tracker 5)
      1 Shield Drone, 15 pts

Heavy Support: Broadside Battlesuit (3#, 188 pts)
   1 Broadside Battlesuit, 98 pts = (base cost 70 + Hard-wired Blacksun Filter 3 + Hard-wired Multi-tracker 5 + Hard-wired Target Lock 5 + Targeting Array 10 + Team Leader 5)
      1 Broadside Battlesuit, 75 pts = (base cost 70 + Multi-Tracker 5)
      1 Shield Drone, 15 pts

Heavy Support: Broadside Battlesuit (3#, 188 pts)
   1 Broadside Battlesuit, 98 pts = (base cost 70 + Hard-wired Blacksun Filter 3 + Hard-wired Multi-tracker 5 + Hard-wired Target Lock 5 + Targeting Array 10 + Team Leader 5)
      1 Broadside Battlesuit, 75 pts = (base cost 70 + Multi-Tracker 5)
      1 Shield Drone, 15 pts

Elite: Crisis Battlesuit (4#, 147 pts)
   1 Crisis Battlesuit, 51 pts = (base cost 25 + Hard-wired Blacksun Filter 3 + Missile Pod 12 + Twin Linked Flamer 6 + Team Leader 5)
      1 Gun Drone, 10 pts
      1 Crisis Battlesuit, 43 pts = (base cost 25 + Missile Pod 12 + Twin Linked Flamer 6)
      1 Crisis Battlesuit, 43 pts = (base cost 25 + Missile Pod 12 + Twin Linked Flamer 6)

Elite: Crisis Battlesuit (4#, 147 pts)
   1 Crisis Battlesuit, 51 pts = (base cost 25 + Hard-wired Blacksun Filter 3 + Missile Pod 12 + Twin Linked Flamer 6 + Team Leader 5)
      1 Gun Drone, 10 pts
      1 Crisis Battlesuit, 43 pts = (base cost 25 + Missile Pod 12 + Twin Linked Flamer 6)
      1 Crisis Battlesuit, 43 pts = (base cost 25 + Missile Pod 12 + Twin Linked Flamer 6)

Troops: Fire Warrior (9#, 90 pts)
   9 Fire Warrior, 90 pts = 9 * 10

Troops: Fire Warrior (9#, 90 pts)
   9 Fire Warrior, 90 pts = 9 * 10

Troops: Kroot Carnivore Squad (11#, 76 pts)
   10 Kroot Carnivore Squad, 70 pts = 10 * 7
      1 Kroot Hounds, 6 pts

: Aegis Defence Lines (2#, 85 pts)
   1 Aegis Defence Lines, 50 pts
      1 Gun Emplacement, 35 pts = (base cost 0 + Icarus Lascannon 35)

HQ: Eldrad Ulthran (1#, 210 pts)
   1 Eldrad Ulthran (HQ) [EL], 210 pts

Troops: Pathfinders (Rangers) (5#, 120 pts)
   5 Pathfinders (Rangers) (Troops) [EL], 120 pts = 5 * 24 (base cost 19 + Pathfinders 5)

Heavy Support: Dark Reapers (5#, 217 pts)
   4 Dark Reapers (Heavy) [EL], 140 pts = 4 * 35
      1 Dark Reaper Exarch [EL], 77 pts = (base cost 47 +  Crack Shot  10 +  Fast Shot  20)

My opponent ran the following (he gave me a hand written copy of his list, so hopefully this is accurate):

2000 Pts - Tyranids Roster

Total Roster Cost: 2000

HQ: Hive Tyrant (1#, 275 pts)
   1 Hive Tyrant, 275 pts = (base cost 170 + Stranglethorn Cannon 20 + Hive Commander 25 + Wings 60)

HQ: Hive Tyrant (1#, 250 pts)
   1 Hive Tyrant, 250 pts = (base cost 170 + Stranglethorn Cannon 20 + Wings 60)

Elite: Hive Guard Brood (3#, 150 pts)
   3 Hive Guard Brood, 150 pts = 3 * 50

Elite: Zoanthrope Brood (3#, 180 pts)
   3 Zoanthrope Brood, 180 pts = 3 * 60

Elite: Venomthrope Brood (2#, 110 pts)
   2 Venomthrope Brood, 110 pts = 2 * 55

Heavy Support: Mawloc (1#, 170 pts)
   1 Mawloc, 170 pts

Heavy Support: Trygon (1#, 200 pts)
   1 Trygon, 200 pts

Heavy Support: Biovore Brood (3#, 135 pts)
   3 Biovore Brood, 135 pts = 3 * 45

Troops: Tervigon (1#, 175 pts)
   1 Tervigon, 175 pts = (base cost 160 + Catalyst 15)

Troops: Termagant Brood (11#, 55 pts)
   11 Termagant Brood, 55 pts = 11 * 5

Troops: Hormagaunt Brood (30#, 180 pts)
   30 Hormagaunt Brood, 180 pts = 30 * 6

Fast Attack: Gargoyle Brood (20#, 120 pts)
   20 Gargoyle Brood, 120 pts = 20 * 6


We rolled Crusade, and dawn of war for mission/deployment.  Per league rules we deployed terrain before choosing sides.  I find this set up stupid and annoying..  As a great General, I would choose the most advantageous terrain possible on which to engage my enemy.  Instead, you get the table set up, then have to hope to win the roll off to choose sides so you don't get stuck with a lousy deployment zone.  The fact that fortifications go down after terrain/on top of terrain would be enough to rectify the one issue people have with choosing table sides, and that is the ability to block your gun emplacement by placing a total LOS blocking piece of terrain in front of it..  As it was, I set up assuming I'd get the side of the table I was standing on, but instead he won the roll off and I got stuck on the side with almost no terrain..  In the end, that may have been to my advantage.. but I'd have done just as well having some cover saves at times.


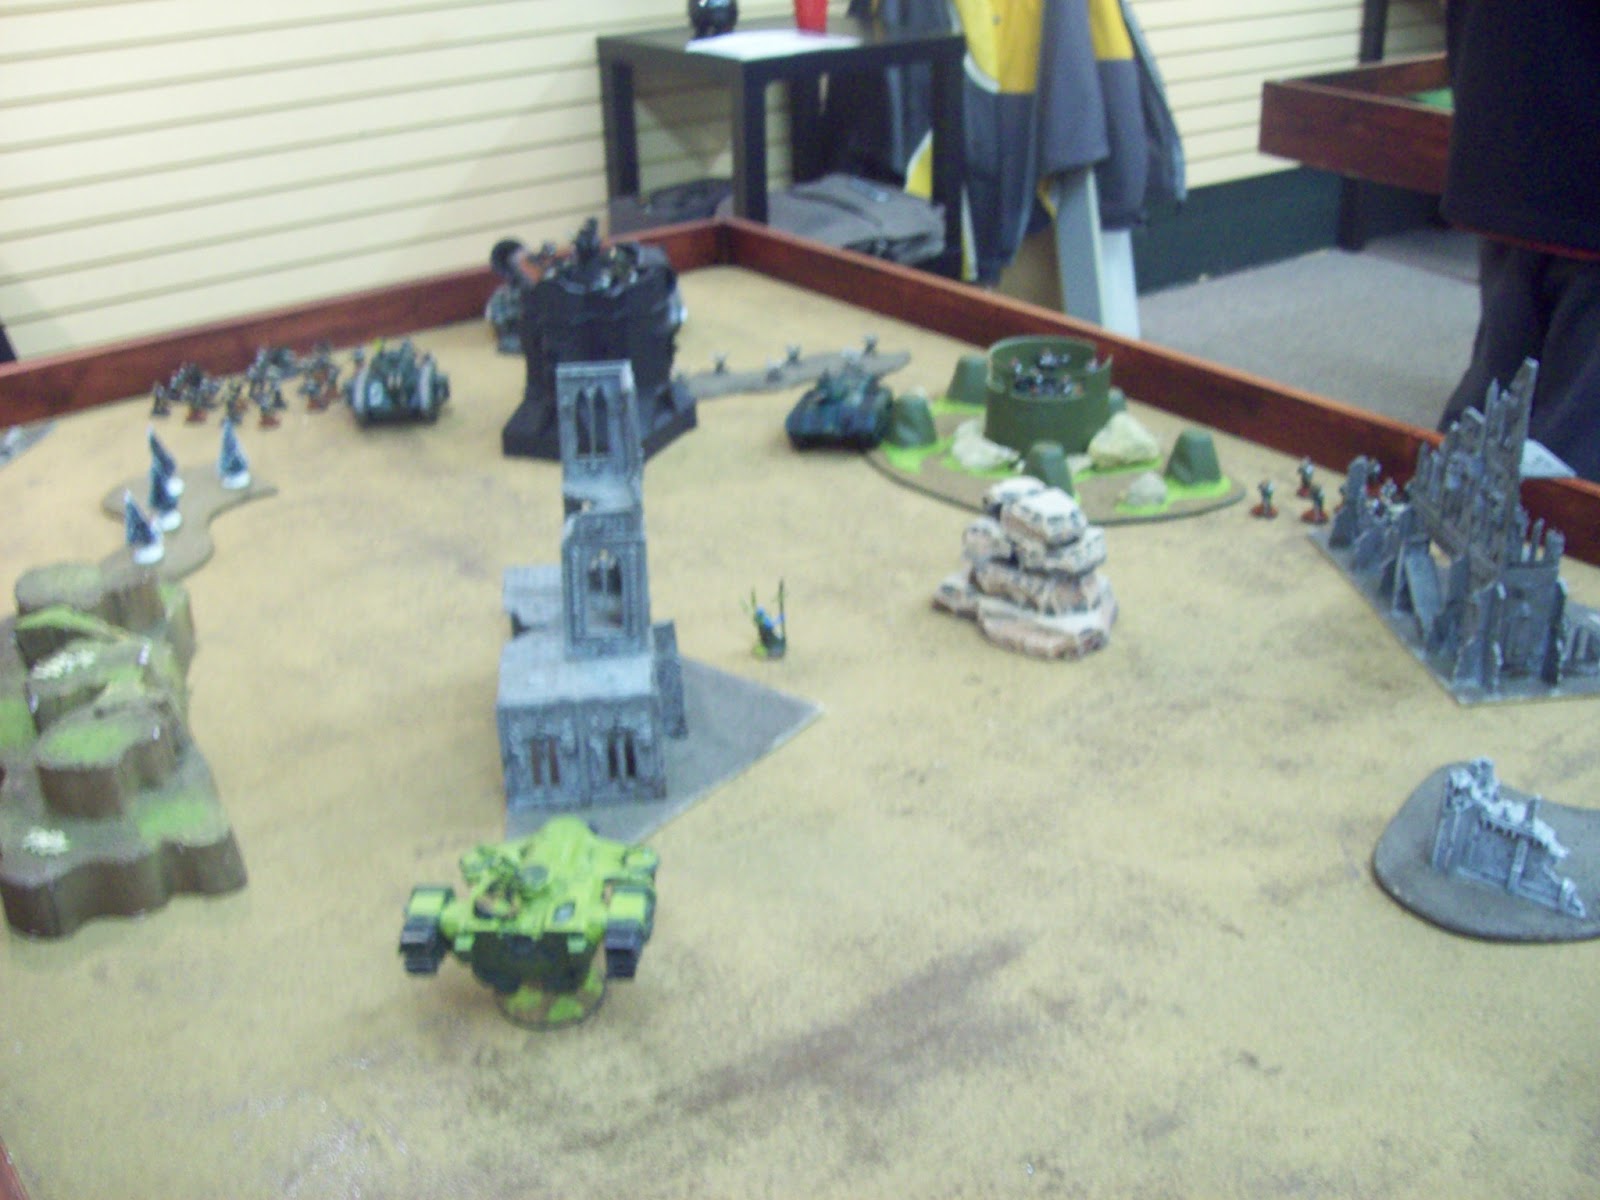
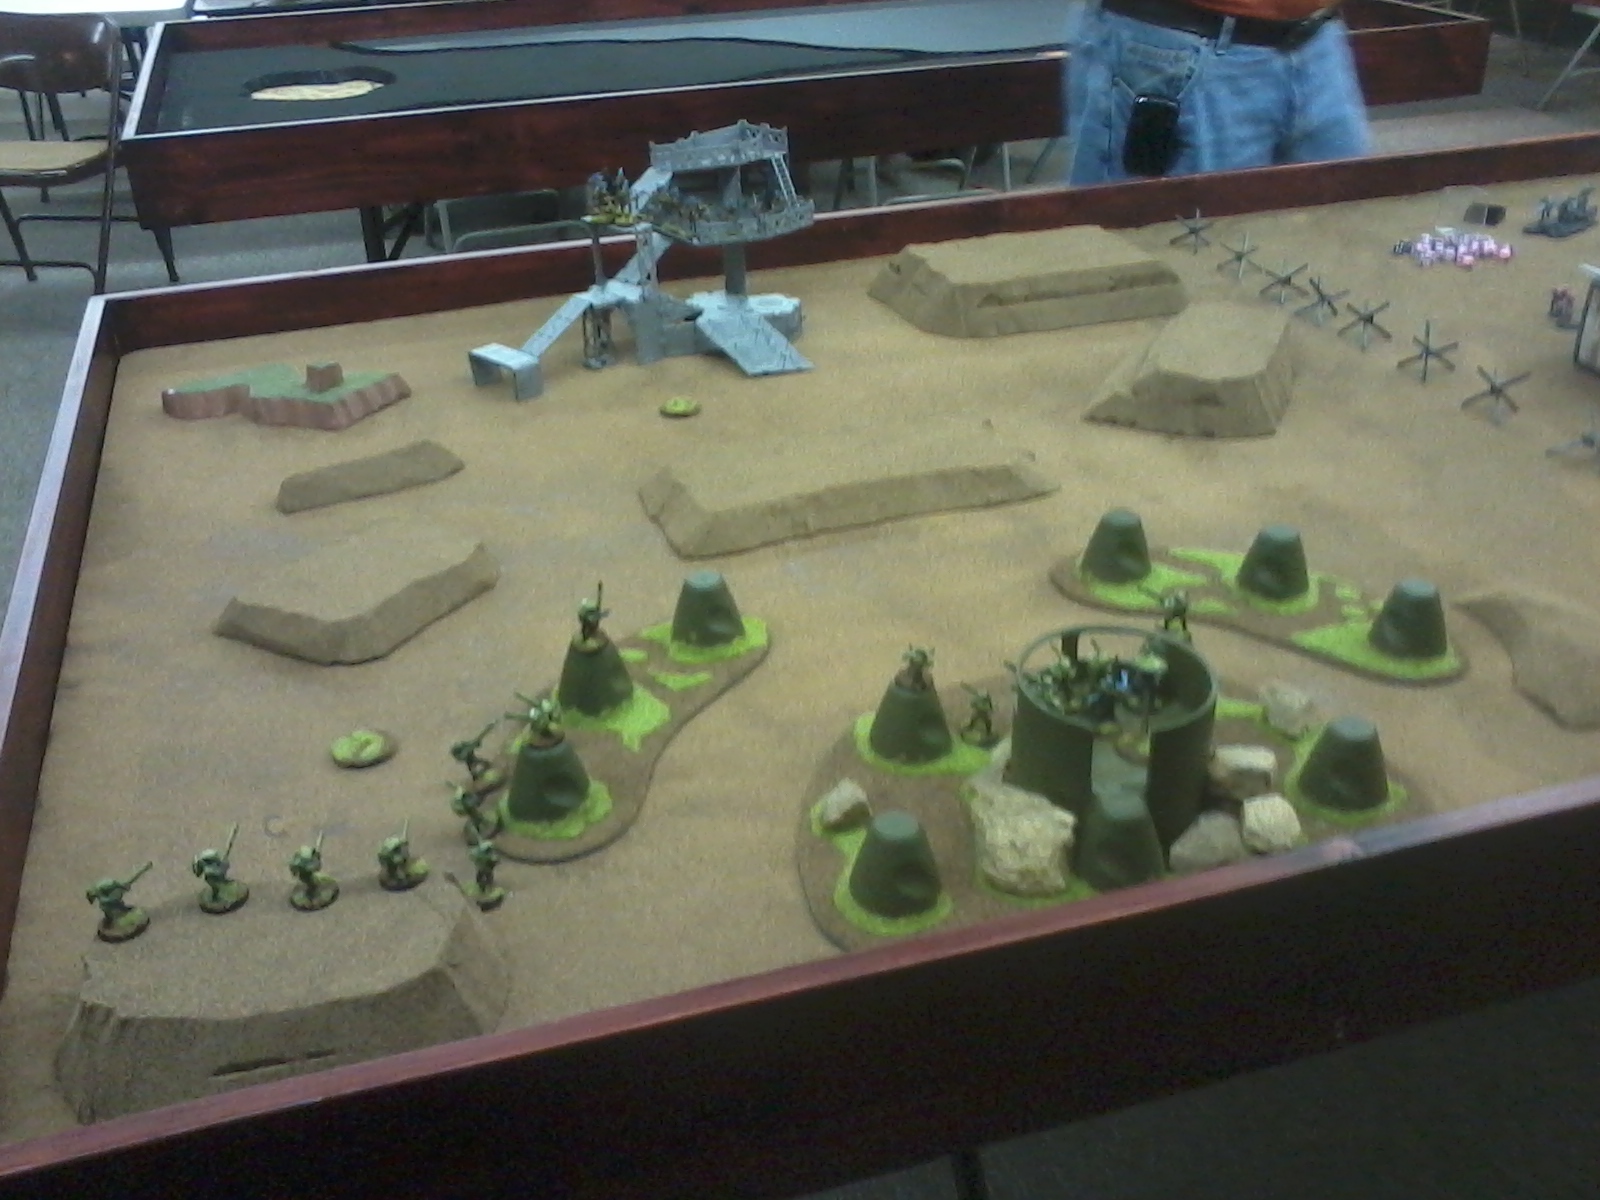
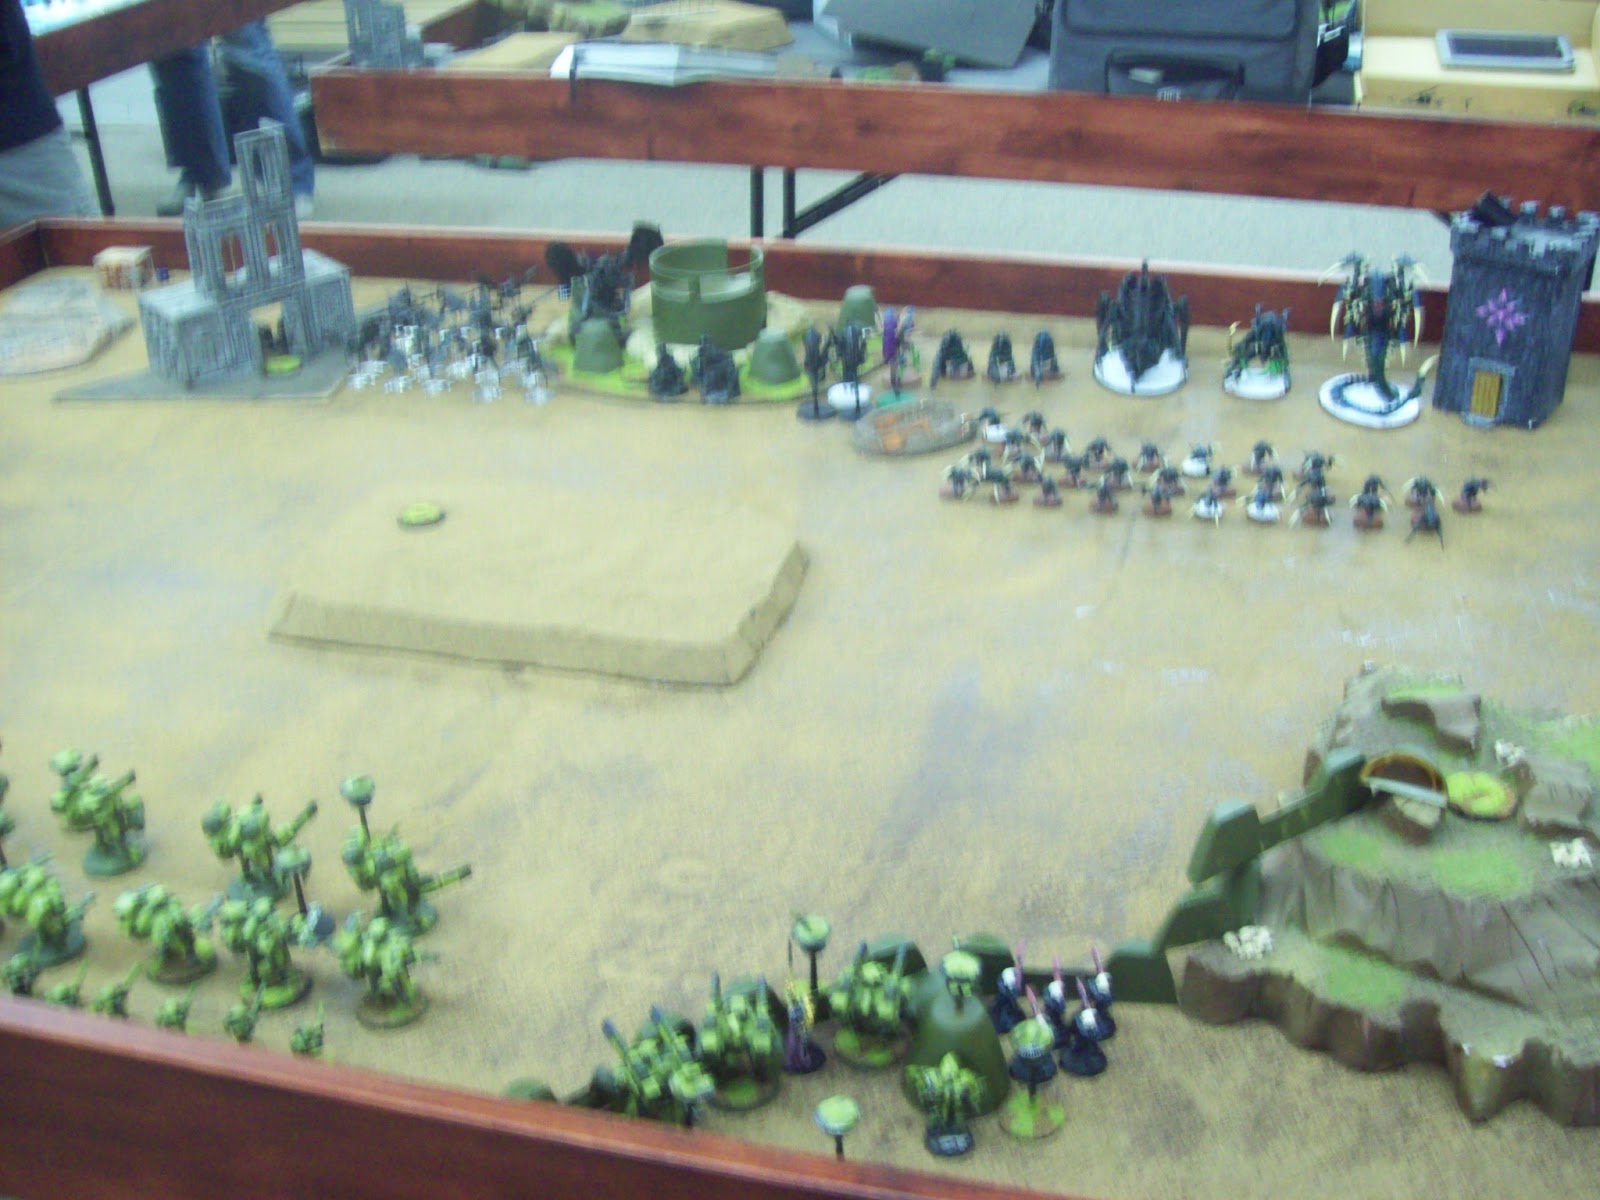
Anyway, he won the roll off to place terrain, so he also placed objectives first.. We then rolled off to choose sides/go first, which he also won.  I failed to seize, and our deployments looked like this.


Turn 1 top:  He flew both flyrants out ahead of his main forces in swoop mode..  I'm not 100% sure that was legal, as they deployed on the board, and it says they have to be in gliding mode to do so..  But perhaps that only means that if I seize I get to shoot at them as gliding until he goes and can change movement to swooping in his movement phase..  No matter, they both flew in, tried to use psychic powers but due to Eldrads runes of warding both suffered a perils and took a wound.  His non warlord flyrant fired the stranglethorn cannon at my eldar pathfinders which went to ground and suffered one casualty.  His warlord fired the stranglethorn cannon at my Dark reapers who fared less well, and suffered 3 casualties..   I don't recall if he killed anything else, but he then ran most of his other units forward, or moved towards objectives.


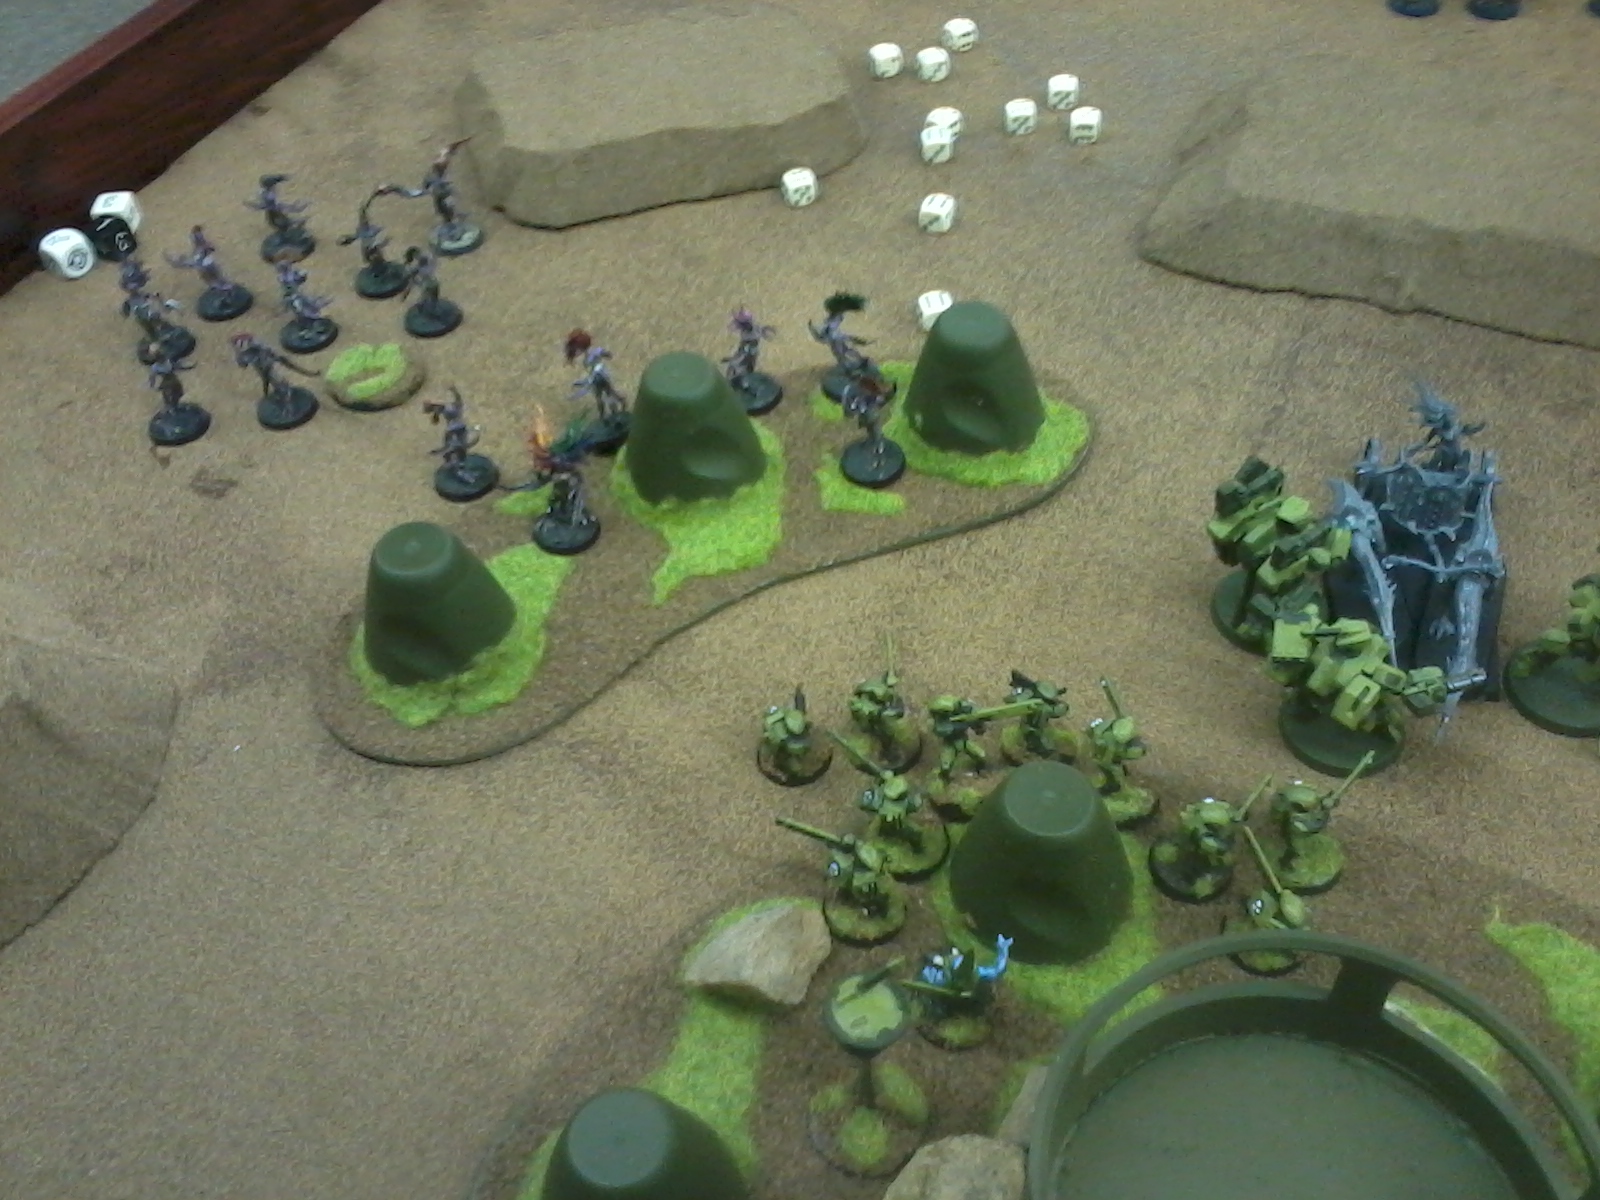
Turn 1 bottom:  I moved my crisis teams out from behind the broadside wall.  Eldrad cast hallucination on the hormagaunts, and got a 5 on the chart.. They managed to kill 12 members of their squad as a result.   I managed to generate hits on both flyrants both of which failed either their first or second grounding tests and where then killed off by combined fire.  First Blood, and slay the warlord to me.  I threw some shots at other units but didn't accomplish a lot.  I thrust moved my two crisis teams around to block his line of attack into my pathfinders from the gargoyles,  and to get the others in line of the hormagaunts to take their charge if need be.


 Turn 2 top:  The Mawlock showed up from reserve and killed two broadsides.  He moved forward with most of his units during movement.  I failed to hit with my interceptor fire (two shots from an Icarus thanks to the Dark Reaper Exarchs fast shot, rolled two ones anyway)..  He shot some more landing a barrage from the biovores but mostly failed to get wounds past my armor.  He attempted an assault on my crisis team with the gargoyles, but after taking 9 wounds from my flamers, he rolled snake eyes for distance and failed to reach them. 


Turn 2 bottom:   My kroot came in on the left flank.  I moved my crisis teams up and positioned them for flamer attacks on the gargoyles and the hormagaunts.  Moved my firewarriors some then activated Eldrad, and used Halucination on the hormagaunts.  I rolled a 3 on the chart, which meant they couldn't run, shoot, charge, or strike blows in close combat for a turn.. We mistook that to mean they couldn't move either which blocked his tervigon and and trygon from advancing on his following turn.  That being the case, I retargeted my crisis team from the hormagaunts to the zoenthropes as I didn't want to create a gap for the MC's..   By the end of my turn I had wiped out the gargoyles, the Zoenthropes, the Venomthropes, one Biovore, the kroot killed a few termagaunts by focusing fire to 5+ cover saves denying the cover for the ruins to the unit, and put 3 wounds on the Trygon all in shooting.  I consolidated the Crisis teams in behind the center hill for a touch of cover.


Turn 3 top:  He moved his MC's toward the center of the board to go around the Hormagaunts.  Move the biovores back a bit, did some shooting then wiped out a crisis team in assault (there was one model left that got swept after rolling a lousy initiative roll)..   He consolidated towards the center objective:


Turn 3 Bottom:   My Camera Batteries died, so I got to test out my new phones camera..  I moved some troops, Eldrad got a 3 on the hallucination table on the hormagaunts, I killed off the biovores, the Tervigon and the Trygon as well as one Hive Guard.  The Kroot moved up and killed a few more termagaunts.  With all the Synapse creatures dead, the hive guard failed their leadership and fell back.


 Turn 4 Top:  He moved the hormagaunts over behind the hill for cover as best he could.  Moved the termagaunts in the center toward that objective, moved the hive guard into cover,  and then shot the hive guard at the crisis team killing the gun drone.

Turn 4 bottom:  Not alot happened.  Moved troops towards objectives, the kroot killed some more termagaunts, I combined fire to kill off more hormaguants,


Turn 5 top:  He moved the hormagaunts up the hill to claim/contest that objective.  He moved the remaining Hive Guard into the area terrain, and the Termagaunts in the left ruin fired on the Kroot killing a couple.

Turn 5 bottom:  This would be the last turn.  The crisis team finished the nearby gaunts clearing that objective.  The broadsides fired on the hive guard killing it, and the other teams fired at the Hormagaunts leaving two remaining.  Shadowsun only generated 1 wound leaving one Hormagaunt alive on the hill.  The kroot assaulted the termagaunts in the ruin killing them and claiming that objective.  I was in such a hurry to wrap up the game I forgot to run my firewarriors so I'm not sure I actually had the objective in my spawn area on the hill, but I had 2 of 3 others, and in the end the gaunt on the hill was the only model he had left on the board. 


The final score had the tau with all 3 secondarys for 3, plus 2 maybe 3 objectives for 9 or 12 points, and the Tyranids had 1 secondary with line breaker for 1.  A solid win for the Tau.

Closing thoughts:  After playing 3 games with Eldar Allies, I have to say my initial hesitation about taking allies has disappeared.  The tau were desperately lacking psychic defense, and AA capabilities.  The Eldar fix that issue nicely even though both codecies lack any fliers or any units with skyfire.  Contrary to what some people have opined, I think the new rules in 6th make the game a lot more fun for everyone, and give players whose codex's haven't been updated since 4th edition the chance to still be slightly competative, which in turn should mean a better game for all involved.. 

Tuesday, January 29, 2013

Tau/Eldar vs Ultra Marines/Dark Angels 2000 pts

Eldar Allies + Broadsides.. Meh..

So, tonight was my first official league match running my eldar allies with my Tau.  I was up against Ultra Marines with Dark Angels allies.

My list consisted of the following:

Total Roster Cost: 1996

HQ: Commander Shadowsun (4#, 175 pts)
   1 Commander Shadowsun, 175 pts

Heavy Support: Broadside Battlesuit (4#, 263 pts)
   1 Broadside Battlesuit, 98 pts = (base cost 70 + Hard-wired Blacksun Filter 3 + Hard-wired Multi-tracker 5 + Hard-wired Target Lock 5 + Targeting Array 10 + Team Leader 5)
      1 Broadside Battlesuit, 75 pts = (base cost 70 + Multi-Tracker 5)
      1 Broadside Battlesuit, 75 pts = (base cost 70 + Multi-Tracker 5)
      1 Shield Drone, 15 pts

Heavy Support: Broadside Battlesuit (3#, 188 pts)
   1 Broadside Battlesuit, 98 pts = (base cost 70 + Hard-wired Blacksun Filter 3 + Hard-wired Multi-tracker 5 + Hard-wired Target Lock 5 + Targeting Array 10 + Team Leader 5)
      1 Broadside Battlesuit, 75 pts = (base cost 70 + Multi-Tracker 5)
      1 Shield Drone, 15 pts

Heavy Support: Broadside Battlesuit (3#, 188 pts)
   1 Broadside Battlesuit, 98 pts = (base cost 70 + Hard-wired Blacksun Filter 3 + Hard-wired Multi-tracker 5 + Hard-wired Target Lock 5 + Targeting Array 10 + Team Leader 5)
      1 Broadside Battlesuit, 75 pts = (base cost 70 + Multi-Tracker 5)
      1 Shield Drone, 15 pts

Elite: Crisis Battlesuit (4#, 147 pts)
   1 Crisis Battlesuit, 51 pts = (base cost 25 + Hard-wired Blacksun Filter 3 + Missile Pod 12 + Twin Linked Flamer 6 + Team Leader 5)
      1 Gun Drone, 10 pts
      1 Crisis Battlesuit, 43 pts = (base cost 25 + Missile Pod 12 + Twin Linked Flamer 6)
      1 Crisis Battlesuit, 43 pts = (base cost 25 + Missile Pod 12 + Twin Linked Flamer 6)

Elite: Crisis Battlesuit (4#, 147 pts)
   1 Crisis Battlesuit, 51 pts = (base cost 25 + Hard-wired Blacksun Filter 3 + Missile Pod 12 + Twin Linked Flamer 6 + Team Leader 5)
      1 Gun Drone, 10 pts
      1 Crisis Battlesuit, 43 pts = (base cost 25 + Missile Pod 12 + Twin Linked Flamer 6)
      1 Crisis Battlesuit, 43 pts = (base cost 25 + Missile Pod 12 + Twin Linked Flamer 6)

Troops: Fire Warrior (9#, 90 pts)

Troops: Fire Warrior (9#, 90 pts)

Troops: Kroot Carnivore Squad (11#, 76 pts)
   10 Kroot Carnivore Squad, 70 pts = 10 * 7
      1 Kroot Hounds, 6 pts

: Aegis Defence Lines (2#, 85 pts)
   1 Aegis Defence Lines, 50 pts
      1 Gun Emplacement, 35 pts = (base cost 0 + Icarus Lascannon 35)

HQ: Eldrad Ulthran (1#, 210 pts)

Troops: Pathfinders (Rangers) (5#, 120 pts)

Heavy Support: Dark Reapers (5#, 217 pts)
   4 Dark Reapers (Heavy) [EL], 140 pts = 4 * 35
      1 Dark Reaper Exarch [EL], 77 pts = (base cost 47 +  Crack Shot  10 +  Fast Shot  20)

My opponents list was something like:

8 DA bikes 2 with plasma,
1 DA tac squad  with missile w/ flak
with Librarian
Drop Pod with 10 man sternguard squad combat squaded into two units on deployment
2 tac squads in Rhino's
1 Assault squad with Commander attached
1 Land Raider
Scout Squad with tellion

We rolled Hammer and Anvil, and Big Guns Never Tire with 4 objectives.

Due to the way the league does deployment we choose deployment zones last, just before deploying so my 2 objectives ended up being in his deployment zone, while the two he placed ended up one in my zone, and one just outside.

We rolled no night fight turn one, and totally forgot it on turn 5.  I failed to seize, so he went first.


Turn 1:  He dropped his pod and stern guard in and split them into two five man teams.  He killed one scout, and put a wound on my broadsides.  He moved his Rhino's up and popped smoke, the land raider moved up and fired.  No much else hit.

Turn 1 bottom:  I wasted most of my shooting trying to kill 5 sternguard for first blood.  Eldrad got Hallucination on the second squad with the "Erm Derp" result (They couldn't do anything their turn).  I only killed 3 out of 5 stern guard, failed to do much with the rest of my shooting and but finally with my last broadside team exploded a Rhino for first blood instead.


 Turn 2:  His bikers came in from reserve, and I managed to kill 2 with the Icarus Lascannons interceptor rule combined with my Dark Reaper Exarchs Fast Shot ability.  He moved his land raider ahead, and did some shooting and took out some crisis suits.


Turn 2 Bottom:  Eldrad Pinned the stern guard with halucination.  Killed 1 of 2 stern guard in the other team.  Killed 3 more bikers with fire from fire warriors.  Popped the rhino that was hidden in the near ruin, then killed a suit jumping onto terrain leaving one suit in that unit.  The landraider resisted my efforts to kill it.


 Turn 3:  His Assault squad and Warlord showd up.  The shot and killed 6 out of 9 firewarriors who fell back.  Tack squad in the ruin moved up to the upper floors to snipe at my Dark Reavers.

Turn 3 bottom:  Our game was running super late at this point.. We were supposed to start at 7:30, but didn't start till nearly 8:30.. I forgot to take any more pictures so I'll sum it up. 

He wiped out the Dark Reapers for 1 VP and in the end held his two objectives for 6 more.

I killed his warlord in shooting, shot the remaining solo stern guard, he assaulted my broadsides with the 3 remaining stern guard in the other unit, lost one to overwatch and lost the other 2 from CC.  I shot up the tac squad in the ruin which fell back, then consolidated back into the ruin where I had to shoot them with Pathfinders, 2 broadsides, and 9 firewarriors, and ultimately assaulted the remaining Sgt with 4 pathfinders, 2 of whom he killed, but I killed him at the bottom of 5 where we ended the game.  I had First blood, slay the warlord, I killed one heavy (the land raider) and held 2 objectives for a total of 9 to his 7.. 

All in all it was a close game.  I discovered my defense line is to tall and always blocks my LOS to enemy units that aren't right in front of it, except for Crisis Suits and Broadsides deployed behind it which can see over.  Having 3 teams of Broadsides was underwhelming even with Eldrad attached giving one unit perfect timing..  The lack of troop transports, and the set up of terrain made it impossible for me to get into his deployment zone.  I should have reserved a unit of Crisis suits to deep strike in..

Anyway, that's about it, I'm looking forward to trying this list out tomorrow against my other opponent and his Tyranid list.

Wednesday, January 23, 2013

Tau vs Guard 1500 League Rematch

P.S.  This is the BOMB!

Farsight Drops
the Bomb!

Tonight I had the opportunity to replay one of my 2 1500 pt league matches after a rules snafu by my opponent had invalidated the original result.  We both ran the same lists per the league rules, and convienantly, we rolled the same mission (the relic) and deployment (Vanguard Strike) as we had played in the first game.

IGWarlord won the rolloff to deploy terrain first (per league rules, all terrain is placed, then there is a roll off to choose sides/deploy first, at which time fortifications can be placed).  The terrain was laid out with me ensuring that no corner of the board had total LOS blocking terrain in it for him to hide his two Colossus Artillery tanks in.  Once the terrain was placed, we rolled off and I won the chance to deploy/choose sides first.  Given that one corner had almost no terrain in it, I did the obligatory douchebag thing and stuck him with that corner, and I took the other (hey, he was the one that put the two pieces of lousy terrain in that corner in the first place..)  We also rolled for night fighting on turn one.

I deployed my troops, consisting of the following:

Total Roster Cost: 1496

HQ: Commander Shas'o (3#, 218 pts)
   1 Commander Shas'o, 188 pts = (base cost 75 + Airbursting Fragmentation Projector 20 + Cyclic Ion Blaster 15 + Ejection System 15 + Hard-wired Blacksun Filter 3 + Hard-wired Multi-tracker 5 + Hard-wired Target Lock 5 + Iridium Armour 20 + Stimulant Injector 10 + Shield Generator 20)
      1 Shield Drone, 15 pts
      1 Shield Drone, 15 pts

HQ: Commander Farsight (10#, 661 pts)
   1 Commander Farsight, 170 pts
      1 Crisis Bodyguard, 59 pts = (base cost 35 + Burst Cannon 8 + Hard-wired Multi-tracker 5 + Hard-wired Target Lock 5 + Twin Linked Flamer 6)
         1 Shield Drone, 15 pts
         1 Shield Drone, 15 pts
      1 Crisis Bodyguard, 75 pts = (base cost 35 + Hard-wired Multi-tracker 5 + Hard-wired Target Lock 5 + Missile Pod 12 + Twin Linked Fusion Blaster 18)
      1 Crisis Bodyguard, 59 pts = (base cost 35 + Burst Cannon 8 + Hard-wired Multi-tracker 5 + Hard-wired Target Lock 5 + Twin Linked Flamer 6)
      1 Crisis Bodyguard, 75 pts = (base cost 35 + Hard-wired Multi-tracker 5 + Hard-wired Target Lock 5 + Missile Pod 12 + Twin Linked Fusion Blaster 18)
      1 Crisis Bodyguard, 59 pts = (base cost 35 + Burst Cannon 8 + Hard-wired Multi-tracker 5 + Hard-wired Target Lock 5 + Twin Linked Flamer 6)
      1 Crisis Bodyguard, 59 pts = (base cost 35 + Burst Cannon 8 + Hard-wired Multi-tracker 5 + Hard-wired Target Lock 5 + Twin Linked Flamer 6)
      1 Crisis Bodyguard, 75 pts = (base cost 35 + Hard-wired Multi-tracker 5 + Hard-wired Target Lock 5 + Missile Pod 12 + Twin Linked Fusion Blaster 18)

Fast Attack: Pathfinder (7#, 143 pts)
   4 Pathfinder, 48 pts = 4 * 12
      1 Devilfish, 95 pts = (base cost 80 + Disruption Pod 5 + Multi-Tracker 10)

Troops: Fire Warrior (9#, 155 pts)
   6 Fire Warrior, 60 pts = 6 * 10
      1 Devilfish, 95 pts = (base cost 80 + Disruption Pod 5 + Multi-Tracker 10)

Troops: Fire Warrior (6#, 60 pts)
   6 Fire Warrior, 60 pts = 6 * 10

Elite: Crisis Shas'vre (1#, 71 pts)
   1 Crisis Shas'vre, 71 pts = (base cost 25 + Hard-wired Blacksun Filter 3 + Twin Linked Missile Pod 18 + Positional Relay 15 + Team Leader 5 + Shas'vre Upgrade 5)

Heavy Support: Broadside Battlesuit (3#, 188 pts)
   1 Broadside Battlesuit, 93 pts = (base cost 70 + Hard-wired Blacksun Filter 3 + Hard-wired Target Lock 5 + Targeting Array 10 + Team Leader 5)
      1 Broadside Battlesuit, 80 pts = (base cost 70 + Targeting Array 10)
      1 Shield Drone, 15 pts

IG Warlord mid deployment.


I placed the 2 devilfish, a firewarrior team, the broadsides, and the monat crisis suit on the board as pictured (the crisis suit was in the building under the broadsides).  I reserved the pathfinders, firewarriors, and attached the shas'o to Farsights team deepstriking.

My opponent deployed his forces consisting of something like:

1500 Pts - Imperial Guard Roster - IG 1500 1750?

Total Roster Cost: 1765

HQ: Company Command Squad (5#, 210 pts)
   2 Company Command Squad, 64 pts = 2 * 6 (base cost 6) + Camo Cloak 20 + Carapace Armour 20 + Flamer x1 5 + Grenade Launcher x1 5 + w/Lascannon 32
      1 Veteran Heavy Weapon Team, 30 pts = (base cost 10 + Lascannon 20)
      1 Lord Castellan Creed, 116 pts

HQ: Company Command Squad (6#, 165 pts)
   4 Company Command Squad, 84 pts = 4 * 6 (base cost 6) + Plasma gun x4 60
      1 Company Commander, 26 pts
      1 Chimera, 55 pts

Troops: Infantry Platoon (36#, 260 pts)
   1 Infantry Platoon, 0 pts
      2 Platoon Command Squad, 14 pts = 2 * 6 (base cost 6) + w/Missile Launcher 27
         1 Heavy Weapons Team, 25 pts = (base cost 10 + Missile Launcher 15)
         1 Platoon Commander, 6 pts
      7 Infantry Squad, 35 pts = 7 * 5
         1 Heavy Weapons Team, 20 pts = (base cost 10 + Autocannon 10)
         1 Commissar, 35 pts
         1 Sergeant, 5 pts
      7 Infantry Squad, 35 pts = 7 * 5
         1 Heavy Weapons Team, 20 pts = (base cost 10 + Autocannon 10)
         1 Sergeant, 5 pts
      7 Infantry Squad, 35 pts = 7 * 5
         1 Heavy Weapons Team, 20 pts = (base cost 10 + Autocannon 10)
         1 Sergeant, 5 pts

Troops: Veteran Squad (10#, 120 pts)
   9 Veteran Squad, 113 pts = 9 * 7 (base cost 7) + Meltagun x2 20 + Grenadiers 30
      1 Veteran Sergeant, 7 pts

Troops: Veteran Squad (10#, 120 pts)
   9 Veteran Squad, 113 pts = 9 * 7 (base cost 7) + Meltagun x2 20 + Grenadiers 30
      1 Veteran Sergeant, 7 pts

Heavy Support: Leman Russ Squadron (1#, 220 pts)
   1 Leman Russ Squadron, 0 pts
      1 Leman Russ Exterminator, 170 pts = (base cost 150 + Heavy Bolter Sponsons x2 20)
         1 Knight Commander Pask, 50 pts

Heavy Support: Ordnance Battery (1#, 140 pts)
   1 Ordnance Battery, 0 pts
      1 Colossus, 140 pts

Heavy Support: Ordnance Battery (1#, 140 pts)
   1 Ordnance Battery, 0 pts
      1 Colossus, 140 pts

Fast Attack: Vendetta Gunship Squadron (1#, 140 pts)
   1 Vendetta Gunship Squadron, 0 pts
      1 Vendetta, 140 pts = (base cost 130) + Heavy Bolter Sponsons x2 10

Fast Attack: Vendetta Gunship Squadron (1#, 140 pts)
   1 Vendetta Gunship Squadron, 0 pts
      1 Vendetta, 140 pts = (base cost 130) + Heavy Bolter Sponsons x2 10

: Imperial Bastion (2#, 110 pts)
   1 Imperial Bastion, 75 pts
      1 Gun Emplacement, 35 pts = (base cost 0 + Icarus Lascannon 35)


Looking back at the pictures, I'm pretty sure that his list included all of the above at least (Edit 1: any reference to a mystery squad later is because I hadn't realized I could add an extra squad to the guard in army builder, I went back and added them into this list so hey are there now, but weren't when I did the write up.  Edit 2: I also recalled his commenting he'd forgot his vetrans had carapace which is a 30pt times 2 squad upgrade bumping the points overrun up further).. I'm not sure how that's possible as the list above is 200+ points over the 1500 limit, and I may have skipped some special wpns/wargear even then..  I'll see if I can get him to comment with his actual list..  But assigning the units above to the units in the picture, I'm a bit confused.

So army lists aside, he failed to seize the initiative so I went first.

IGwarlord moving bottom turn 1
Turn 1:  I moved my devilfish around, my broadsides split fire on the bastion and a colassus.  Failed to pen the bastion, exploded the collassus (first blood to me)


He moved his blob squad, and the mystery squad that isn't listed above toward the ruin that was just outside his deployment zone.  He then ordered the blob to "move move move" and they did, his weapons fire was inefective due to night fighting giving my devilfish 2+ cover saves.


Turn 2:  All my reserves came on.  Firewarriors embarked in the pathfinder fish, pathfinders hid in the far corner behind a ruil, farsight bomb missed the initial deepstrike roll, but re-rolling due to the pathfinder fish they scattered 2" into an ideal landing zone.  I moved the devil fish around a bit, then went on to shooting.  Farsight's team split fire with 4 twin linked flamers causing 19 hits/17 wounds plus a couple more from burst cannons on the blob squad reducing it too 1 model remaining, Farsight and a twin linked fusion/MP suit took 2 hull points off the Leman Russ and imobilized it.  A fusion suit target the bastion and destroyed a gun emplacement.  Shas'O dropped a barrage shot onto the battlements killing the lascannon team, 1 guardsman and put 1 wound on the Warlord.  The other Fusion suit exploded the remaining Colossus.
The Bomb.
After the bomb.


He got 1 out of 2 vendetta out of reserves on his turn 2.  He managed to imobilize his second HQ's chimera and further shifted part of mystery squad into the ruins second floor.  The vendetta killed a shield drone and 1 broadside but the remaining one made it's moral.  Warlords squad killed a drone and a suit that controlled 2 other drones, causing a moral check which I passed.


Turn 3:   I moved up 2 dfish to the Relic (my ethereal), one went flat out, the other went 6 and deployed 6 firewarriors into contact with the relic.  Monat suit moved up towards center board, and farsight's team spread out a bit to fire at the single guardsman, the tank, the bastion the chimera, and the platoon command squad in the green ruin.  The tank died, the icarus and a heavy bolter were destroyed in the bastion, the chimera lived, but the missle team and 2 other models died in the green ruin from the Shas'o's AFP+Cyclic Ion shots.

His other vendetta came on, and he dropped off a vet squad near the broadside.  He also moved is warlords remaing squad inside the bastion.  His vendetta exploded the flat-out DFish killing 2 guys inside, and one from the team with the relic. but not much else happend.


Turn 4:  I circled around the bastion to put shots into it, the chimera and the remaining guys in the green ruin area.  I moved my firewarriors into the ruin and the other team onto the ruins base.  The DFish I moved back to get a rear arc shot on a vendetta, but instead chose to flat out, and imobilized myself on a piece of terrain.  I destroyed the Bunker, killing everyone inside (after another rules snafu where my opponent read the book and declared that it said one thing, but a bystander later in the turn read the same section to discover it said something entirely different and that you take 2d6 str 6 wounds, not each model takes a 2D6 str wound when you get a 6 on the chart.  Big diff when you only have 2 models remaining).  I missed the dudes by the green ruin again.

He moved a vendetta over to attack Farsight, moved the other over the ruins my firewarriors were in and dropped more veterans..  He moved his first vets over to fire on the remaining devil fish.  He killed two TLFL/BC suits with one vendetta, and his vets killed 3 out of 4 firewarriors in one squad and 1 inside the ruin from a flamer hit.

Mid 4th turn move.
End of top of 5 shooting.


Turn 5:  I moved farsights team around, moved the firewarrirs out with the relic to shoot at the guardsmen, detached the drones from my fish and advanced towards his deployment zone.  Farsights team got a lucky hit with a fusion blaster and exploded a vendetta, the Shas'O dropped his AFP shot on the vets and along with firewarrior shooting they were reduced to 4 models and failed their moral falling back.
Alas, I forgot to take pictures after this.  Bottom of Turn 5 movement phase.

Bottom of turn 5 he put his remaining vendetta into hover and moved over to fire on my firewarriors.  Somehow his 4 vets, regrouped and managed to move 6 inches (or far enough to get past the base of the ruin, and they, the other vets,  and the vendetta killed all but 2 firewarrios in the squad with the relic.  They then assaulted and wiped out the firewarriors consolidating onto the relic.  The mystery squad killed my two drones, and the 3 models in the vicinity of the green ruin shot ineffectually at Farsights team.

We rolled for turn 6 but the game ended.  I had scored first blood, slay the warlord, and had linebreaker.  He was a couple inches from linebreaker with the vets that dropped near the broadside, but in the end had no secondary points.  As he did not get into base with the relic in the move phase, he could not claim it and so I won 3 points to none.

Thanks for taking the time to read my post, I try to get a game in weekly if not 2.. I'm trying to be better about making reports and keeping the blog lively, so check back often.

Sunday, November 25, 2012

After a brief Hiatus from gaming, I have recently gotten back into playing 40K and have been working on painting my army again. I've even joined a local escalation league at the midway point (1250), and have thus far been relatively successful.

For my two league games at the 1250 level (both ringer games as my opponents already had their league games in) I first played Aaron and his Ultra Marines. We rolled the Relic, and Hammer and anvil.

My list was composed as follows:

1250 Pts - Tau Empire Roster - 1250 League v6

HQ: Commander Shas'el (2#, 97 pts)
1 Commander Shas'el, 97 pts
1 Shield Drone (Automatic Unit Type; Shield Generator)

Troops: Fire Warrior (12#, 255 pts)
10 Fire Warrior,
1 Shas'ui (Markerlight target lock)
1 Devilfish (warfish)

Troops: Fire Warrior (12#, 255 pts)
10 Fire Warrior,
1 Shas'ui (Markerlight target lock)
1 Devilfish (warfish)


Fast Attack: Pathfinder (9#, 216 pts)
8 Pathfinder,
1 Devilfish (Warfish)

Heavy Support: Broadside Battlesuit (3#, 178 pts)
1 Broadside Battlesuit (Team Leader, SMS, HWMT, HWTL, HWDC, BSF)
1 Broadside Battlesuit (SMS, MT)
1 Shield Drone (Automatic Unit Type; Shield Generator)

Heavy Support: Broadside Battlesuit (3#, 178 pts)
1 Broadside Battlesuit (Team Leader, SMS, HWMT, HWTL, HWDC, BSF)
1 Broadside Battlesuit (SMS, MT)
1 Shield Drone (Automatic Unit Type; Shield Generator)

Heavy Support: Hammerhead Gunship (1#, 190 pts)
1 Hammerhead Gunship, (Railgun, + all options)


Aarons Ultra marines were something to this effect (I'm missing some wargear options as this doesn't add up to 1250):

Captain in artificer armor (Warlord) with plasma pistol and ? attached to 10 sternguard with a combi melta and two plasma guns in a drop pod
2 5 man tac squads in rhinos
1 devastator squad with 2 las, 2 missile, and like 5 or 6 extra models with bolters to absorb shots (there was some character or something attached I think, that may account for the missing points)
Scout squad with cloaks of 5 including tellion
1 Vindicator

Since I didn't take any pictures, I'll just summarize the game. Aaron won the roll-off and chose to go first. He scored first blood top of turn one, after deepstriking the HQ and sternguard in behind my hammerhead and glancing it to death (I think it's BS that I don't get a Jink on my skimmers if I haven't taken a turn yet to move them, it's not like they've been sitting there immobilized prior to this battle starting). This also set him up to score line breaker later as he had 1 sternguard left at the end of the game that I just couldn't kill. In return, I eventually killed his Warlord with massed fire, and managed to snag the relic at the bottom of turn 7 by jumping my 2nd firewarrior team out of a devil fish I'd been using to block his tac squads from getting near it. Amusingly I had a second devil fish there to aid in the denial, which was eventually imobilized, but with some luck DPod rolls it managed to survive till the end of the game.

Final score, Tau 4, Ultra marines 2.


My 2nd match was against Josh's Imperial Guard. I ran the same list as it was a league, and you had to run the same list for both games at a given point level. We rolled vanguard strike and the relic (2nd game in a row). Josh ran something like:

Lord Commisar
Platoon command squad
Large Blob squad with HQ attached
Aegis Defense Line with Quad Gun (fired by Commisar)
Leman Russ x 2 with standard battle cannon
Manticore (buried in a ruin in the back corner with no LOS in or out)
Vetsquad with 10 men and 2 plasmaguns in
Vendetta x 2

Again I failed to take any pictures, mostly because my phone service is off so I haven't been carrying it around.. Josh won the roll off and went first. We rolled and got night fighting for turn one He illuminated a devilfish with a leman russ's spotlight, then since it was "illuminated", could target it with his Manticore which was outside of 36" which is the cut off for targeting when nightfight is active. I realize the rules can't account for every circumstance, but how is it that a vehicle with no line of site to a target, can then shoot at it beyond the targeting range just because there is a spotlight on it? No idea, but suffice it to say that his Str 10 ap 1 large blast exploded one devilfish, and immobilized the one next to it while also killing 4 firewarriors and a pathfinder that were nearby, giving him first blood, and severely limiting my tactical options as far as getting near the relic. I deepstruck my Shas'el in behind the manticore on turn 2, hoping to neutralize it even though I expected it would cost me a vp for slay the warlord.. Of course he scattered out from behind the Ruin and only had a shot at a Leman russ that my broadsides had taken a hull point off from. He glanced that to death, then managed to jump back into the ruin on his thrust move. He never did kill the damn manticore, but wittled down a good chunk of the command blob squad and scored me Line breaker at the end of the game. I did manage to shoot down a zooming vendetta with my broadsides, killing 8 of 10 guys inside. This would have left them in position to get linebreaker, but I eventually killed one and the other was falling back at the end of the game. The final tally left us with no one in possession of the relic, Josh had first blood, and I had line breaker.

Tau 1, Imperial Guard 1 for a tie.


In preparation for the 1500 point level starting in a week, I thought I'd try something different and got in a practice game at Battlefront vs Jakes Imperial guard list Saturday. We initially rolled vanguard strike and the scouring, but we both hate that mission with the 6 random pt objectives, so we rerolled and got... THE RELIC!.. That was better than the scouring, so we went with it for the 3rd time in a row. I ran the following:

1500 Pts - Tau Empire Roster - Tau 1500 league V2

Total Roster Cost: 1499

HQ: Commander Shas'o (2#, 188 pts)
1 Commander Shas'o, 173 pts = (base cost 75 + Airbursting Fragmentation Projector 20 + Cyclic Ion Blaster 15 + Hard-wired Blacksun Filter 3 + Hard-wired Multi-tracker 5 + Hard-wired Target Lock 5 + Iridium Armour 20 + Stimulant Injector 10 + Shield Generator 20)
1 Shield Drone, 15 pts

Troops: Fire Warrior (7#, 216 pts)
5 Fire Warrior, 50 pts = 5 * 10
1 Shas'ui, 46 pts = (base cost 20 + Markerlight 10 + EMP Grenade 3 + Hard-wired Blacksun Filter 3 + Hard-wired Multi-tracker 5 + Hard-wired Target Lock 5)
1 Devilfish, 120 pts = (base cost 80 + Disruption Pod 5 + Multi-Tracker 10 + Smart Missile System 20) + Targeting Array 5

Troops: Fire Warrior (10#, 136 pts)
9 Fire Warrior, 90 pts = 9 * 10
1 Shas'ui, 46 pts = (base cost 20 + Markerlight 10 + EMP Grenade 3 + Hard-wired Blacksun Filter 3 + Hard-wired Multi-tracker 5 + Hard-wired Target Lock 5)

Fast Attack: Pathfinder (9#, 172 pts)
6 Pathfinder, 72 pts = 6 * 12
1 Devilfish, 100 pts = (base cost 80 + Disruption Pod 5 + Multi-Tracker 10) + Targeting Array 5

Heavy Support: Sky Ray Missile Defence Gunship (1#, 170 pts)
1 Sky Ray Missile Defence Gunship, 170 pts = (base cost 125 + Smart Missile System 20 + Disruption Pod 5 + Multi-Tracker 10) + Blacksun Filter 5 + Targeting Array 5

Heavy Support: Sky Ray Missile Defence Gunship (1#, 170 pts)
1 Sky Ray Missile Defence Gunship, 170 pts = (base cost 125 + Smart Missile System 20 + Disruption Pod 5 + Multi-Tracker 10) + Blacksun Filter 5 + Targeting Array 5

Heavy Support: Broadside Battlesuit (4#, 200 pts)
1 Broadside Battlesuit, 90 pts = (base cost 70 + Hard-wired Target Lock 5 + Advanced Stabilisation System 10 + Team Leader 5)
1 Broadside Battlesuit, 80 pts = (base cost 70 + Advanced Stabilisation System 10)
1 Shield Drone, 15 pts

Elite: Stealthsuits (3#, 152 pts)
1 Stealthsuits, 40 pts = (base cost 30 + Targeting Array 10)
1 Stealthsuit Shas'vre, 72 pts = (base cost 35 + Targeting Array 10 + Hard-wired Multi-tracker 5 + Hard-wired Target Lock 5 + Markerlight 10 + Shas'vre Upgrade 5) + Fusion Blaster 2

Fast Attack: Piranha Light Skimmer (3#, 95 pts)
1 Piranha Light Skimmer, 95 pts = (base cost 60 + Disruption Pod 5) + Fusion Blaster x1 5 + Seeker Missile x2 20 + Targeting Array x1 5


Jake ran something like:

Lord Commissar with small command squad in a chimera
30 man blob squad with some grenade launchers and a commisar?
Platoon command squad with heavy bolter and a standard of some sort
Vet squad in a chimera
heavy wpn team x 3 missle launchers
heavy wpn team x 3 lascannons
Basilisk
Leman Russ x 2 with standard battle cannon
Aegis defense line but no gun emplacement


He won the roll off to go first, and I failed to seize. My warlord got the ability to make it nightfighting turn 1, so I did so as every unit I had had Blacksun Filters. He failed to kill any units on turn one, and through significant use of markerlights, I managed to destroy his vets chimera with seeker missiles hitting from the side from my piranha which had moved flat out all the way to his board edge and from the front from the two skyrays, and put a hull point on the command chimera, first blood to me. After turn one, the Skyrays were really pretty worthless as far as the seaker missles were concerned. Strength 8 ap 3 is just not enough to reliably put glancing hits on av 13-14.. The sms systems on them helped by ignoring cover and taking out most of the missle launchers, but all things considered, they seemed to have wasted 2 heavy slots while performing no better than a warfish. I'd rather have had 2 Ionheads, or 2 2 man broadside teams in their place. The 3 man stealth team payed for themselves easily. They contributed a markerlight hit toward killing the chimera turn one, they wiped out the lascannon squad (all but one wound to which I donated a railgun shot in order to finish them off on turn 2). They drew fire from the basilisk turn 3 saving my firewarriors from getting pancaked. They wiped out most of his Warlords unit on turns 4 and 5 which let me finish off his warlord with a railgun shot on turn five. And they scored me line breaker as the game ended after 5. In the final tally, no one was on the relic, though I had 6 firewarriors an inch from it. I'd scored first blood, slay the warlord and linebreaker. Jake had no points.

Tau 3, IG 0 for a win.


So, in summary, out of the 3 games I've played most recently, I would have to say that the return of Target Locks to my infantry, and the improvements to Disruption Pods have really helped make the Tau feel somewhat competative. My vehicles and stealth suits are so much more survivable now it is just huge. Much as I want to like the Skyray, it just under performs dreadfully. If the seekers had some missle options, or weren't limited to 6 per vehicle, or if the skyray had skyfire as it should, it might be a different story, but as it is, they will be going back on the shelf till a tau codex or an errata comes out to fix them.

If you made it this far. Thank you very much for taking the time to read my post. I'll make sure to include some pictures from now on.

Friday, June 8, 2012

Tau vs Chaos Daemons

I got in a quick game this evening at Big Kidz Games new location.  It was a 750 pt battle between my Tau and Mikes Chaos Daemons.  The mission was Capture and Control and the deployment was Dawn of war.

Mike won the roll off and chose to go first and thus deployed nothing due to Chaos Daemons wierd deployment method.  I deployed second in what I now believe was an illegal deployment.  I placed 2 teams of firewarriors as my troops and my Ethereal as my HQ.  However then I infiltrated my Kroot which gave me 3 troops on the board before turn one.. I don't think that's legal.  Anyway, mike allowed it, so here's my deployment:


Top of Turn one:  Mike failed his deployment role and got the wrong troops ending up with 2 squads of Pink Horrors and one squad of Screamers.  In addition to his failed deployment, the scatter dice suffered some chaotic influence placing his screamers too near my board edge:


Despite his poor deployment the 2 squads of horrors were more than enough to wipe out all 10 kroot in his first round of shooting.  The screamers did nothing.

Bottom of turn one: the remainder of my force came on the board, I placed my commander with shield drone, and my 3 suit crisis suit squad with shield drone all in twin-linked flamer range of the screamers.  I placed the hammer head there as well just in case (good thing).  

When all was said and done I fired everything that could see them (dawn of war) at the screamers before finally taking them out.  In my assault move I moved the suits up and the one whom I moved into terrain failed his roll and took a wound.

Top of turn two:   Chaos failed it's reserve rolls, mike moved his horrors and shot 1 squad at my firewarrors killing 4 models.  The other horrors ran for cover from a nearby hill:

 Bottom of Two:  I shifted the crisis team toward the center, and moved my commander into the terrain for a better line of site to the enemy.  The Hammer head moved twelve too get a shot past the hill at the nearby horrors if the other squad was dead before it's turn to shoot.  

Sure enough, 16 firewarriors, and 6 missles from the crisis suits was enough to wipe out the squad of 7 horrors to my left.  My commander and hammerhead both fired at the squad to the right failing to kill a single model.  My Hammer Heads blast template missed all but one shot this game I think.

Top of Three:  The Chaos Gods see fit to send in 2 Chariot Heralds and a squad of Daemonettes, one herald and the Daemonettes deploy on target left of center and in his half of the board, the other herald scatters onto the first Herald, and Mike rolls a 6 sending it back to reserves.  The pink horrors move up, the daemonettes run and the Chariotte sits there.  

The horrors shoot my commander scoring one wound, I stupidly place it on my drone which fails its save and dies.  My commander roles a 10 for leadership, which he re-rolls thanks to the Ethereal, and gets ANOTHER 10!.. He falls back... 10..

Bottom of Three:  In a move to save my commander, I detach my Ethereal from the firewarriors and move him back 4" out of the ruin so my commander can see him.  I roll for my commander to regroup being at 50% and got a ten.. Good thing I moved my Ethereal, I switched dice and re-rolled my leadership needing a 9 and this time I got a ... TEN!! ARE YOU FRIGGIN KIDDING ME?!?!  WTF!?!? AHHHhhhh..  He proceeded to fall off the board.  I didn't move my hammerhead. 

Troops all fire at daemonettes killing a few.  Crisis team fires at Horrors with 6 missiles and fail to kill anything.  Hammer head fires a slug at the Herald, hits, wounds, and the herald makes its cover save from the hill blocking it's ankles..  GOD I hope 6th fixes the stupid cover rules.. I move my crisis suits over in front of the firwarriors to keep them from being assaulted and thinking I'll get a chance to use the flamers soon.

Top of turn 4:  Mike gets his other Daemonettes and Herald from reserves. Daemonetts all advance, one squad assaults my first team of firewarriors, the first herald moves runs and charges, the pink horrors move towards his objective. So much for my flamers shooting anything else.  

The firewarrors are wiped out in the assault.  I promptly lose my shield drone to a rending wound and lose the combat but thanks to my Ethereal manage to pass my leadership and stick around.

Bottom of turn 4:  My Hammerhead advances to contest Mikes objective and hopefully redeem itself by killing something.  

The remaining firewarriors gun down all but 2 of the Daemonetts that had wiped out the other squad, would have killed them all but they went to ground.  The Hammerhead misses with its sub-munition almost hitting itself with the scatter.  I take two more rending wounds and lose combat with the Herald, but again stick around.

Top of turn 5:  Pink Horrors move to cover and claim their objective.  Daemonetts who can move, run, then assault the firewarriors and Ethereal.  

The image is just before the assault.  Mike forgets to allocate attacks to the ethereal and thus wipes out 6 firewarrors.  Ethereal kills a deamonette.  Firewarriors lose the combat but are fearless due to the Ethereal so they fight on.  Herald kills 2 suits, the remaining one sticks around.
Bottom of turn 5:  Hammer Head moves over to contest Mikes objective, fires it's sub-munition and kills 2 pink horrors out of 5 (god my dice hate me).. Herald kills the remaining suit and consolidates towards the hammerhead.  Daemonettes kill remaining firewarrors leaving only the Ethereal and his drone to strike back. 

They fail to wound, and with the firewarriors gone they are no longer fearless, the Ethereal fails his leadership at 6, rolls a total of 6 for his init test and dies as the Daemonettes roll a 7.
There is not roll for continuation as Big Kidz closes at 11 on Thursdays and it was already past that as we started at 9.

End Game result:  I have only a hammer head on the board, contesting Mikes objective with nothing to control mine.  Mike has most of his army left minus the screamers and 1 squad of horrors, but the mission is Capture and Control so it is a Draw.


After Battle thoughts:  I took the firewarrors knowing Mike was running daemons and knowing he'd have all invulnerable saves.. But for some reason still wasted points on the Hammerhead thinking I might be able to tank shock with it atleast.  Mikes Whole army was fearless and eternal warriors.. I should have skipped the hammerhead and added 16 more firewarriors.. I also should have placed the Kroot in front of my ruins and my firewarrors.. It wouldn't have mattered if I shoot through them, as mike already got a 4+ invuln on all but the Daemonettes, but it would have let me focus fire better, and maybe they would have survived as mike wouldn't have deep struck so close to them knowing the firepower he'd face on my board side.  All in all, my biggest mistake was rolling my dice, as yet again they failed to roll anywhere near statistically for me, while mike seemed to make every save he took.. Better luck next time I guess.